Featured
How To Make Personal VPN at Home [Tutorial]

VPN is short for Virtual Private Network. It helps to create a secure connection to other networks over the internet. It’s a tool which allows you to access websites restricted to a region and protect your browsing activity. In easy terms, VPN creates a tunnel between your device (laptop, phone, tablet, etc.) and other computers are known as a Server over the internet. So, we will provide you with the How To Make Personal VPN On Android or How To Make Personal VPN on Mobile, which will help you the most. It also helps in keeping the data on your device safe and doesn’t allow hackers to check your personal information, IP, Address, etc. Read this full article to know more about How To Make VPN on Mobile, How To Create Personal VPN on Android, and How to Setup a VPN Server:
How Does a VPN Help You?


You can use VPN to:
- Bypass the region-restricted websites or streaming video and audio
- Watch streaming media like Netflix and Hulu.
- Protect yourself from snooping on untrustworthy WiFi hotspots.
- Gain privacy by hiding your exact location online
- Protect yourself from being logged while torrenting.
How to Set-up a Personal VPN
Set up a Linode VPS
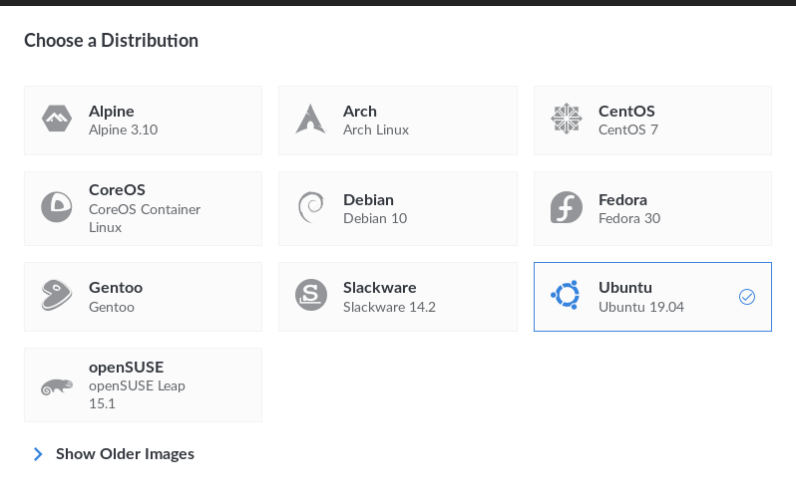
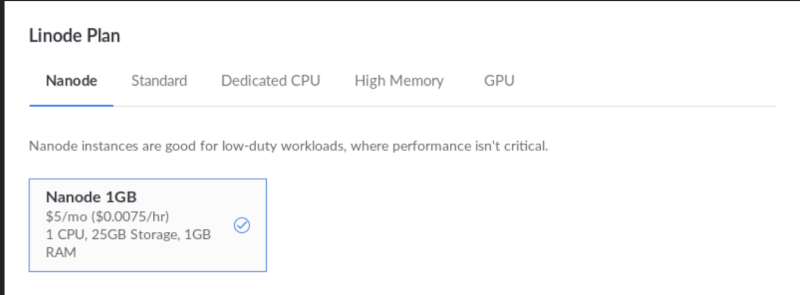
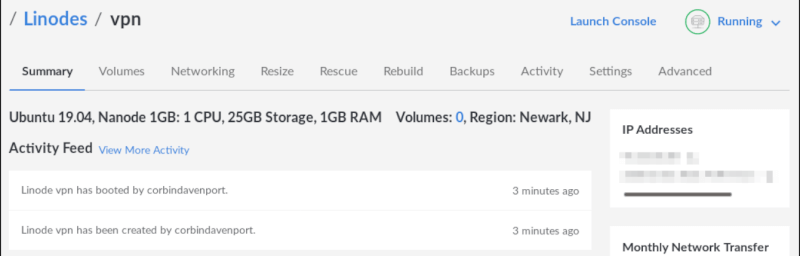
The first step is to create a Virtual Private Server (VPS). VPS is a virtual machine that our VPN will run on. So to do that, go to Linode’s site and make your account. To create an account, you’ll need to enter the billing information as this service is not free. Once you do that, click on this LINK.


Log into the VPS
Follow these steps to log into your VPS since the server doesn’t have a graphical interface like Windows or macOS.
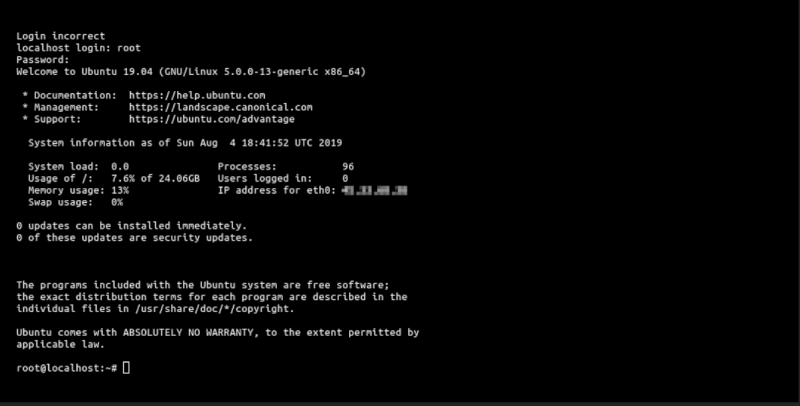

After opening your VPS, click on ‘Launch Console’ which is there on top-right of the display. This will open a web-based terminal. There, you’ll need to log in. When prompted, type ‘root’ (without quotes) and press enter. After that, you’ll be asked to enter the password (this is the same password which you added in the ‘Root Password’ box) and press enter. After that, you’re all loaded and logged in and greeted with a “Welcome to Ubuntu” message.
Set up the VPN
Since we’ll be using OpenVPN road warrior install script to get everything running, there is no need to panic. Just run this command in the Lish console window or just copy and paste the command given below.
wget https://git.io/vpn -O openvpn-install.sh && bash openvpn-install.sh
After this, the script will ask your IP address, the protocol to use and other information. When asked for IP address and protocol, press enters, but when you’re asked for the port, enter 443. After that, press enter when asked which DNS to use, and then join your name when asked. The script will then automatically install the required software and set everything up.


Download the login info
To open the OVPN file on your computer, use Firefox Send.
First, install the Firefox Send application on your server with this command:
snap install ffsend
ffsend upload file.ovpn --download-limit 1 --password
When asked, enter the password, and you’ll get an ‘Upload complete’ prompt. Next, run this command to get the link:
ffsend history
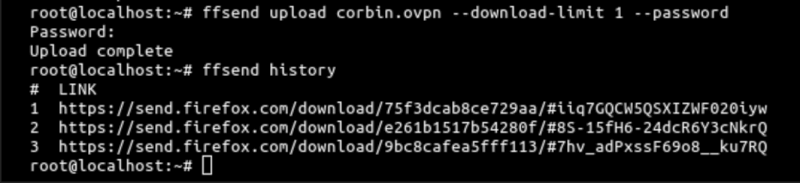

This will show the links you’ve generated. The first link will be the most recent one.
After you see, copy and paste the link in your browser which will download the file. Once you have it, copy it all the device using whatever method you want
Connect to the VPN
After following all the steps, your VPN is now ready to use. In this article, we’ll show you how to connect your VPN to an Android device. There are OpenVPN clients available for most of the operating system. To connect to Windows, Mac, IOS, click HERE.
Now, to connect to your Android device, download OpenVPN for Android from the play store, tap the import button in the top-right corner and select your .ovpn file.


Once you find the .ovpn file, click it and press the Save button in OpenVPN. To connect to the VPN, tap on the new connection option which will be there on the main screen, and if you successfully connect to the VPN, you should see a lock icon next to the WiFi indicator on your device
Set up two-factor authentication
The last thing to do is set up 2-factor authentication on your Linode account. You can enable 2FA with your app of choice, including Google Authenticator and Authy. A code will be required for log in to Linode.
Why You Might Not Want to Do This
Like everyone else, you might be using a home internet user, so you’ve got extremely limited and possibly slow upload bandwidth, and you might even have bandwidth limits or caps. Unless you have a gigabit fibre, setting up your VPN might be the most time-consuming possible option.
That’s All For Today. Stay Tuned To TechBurner For More Tutorials.
