Custom ROMs
How to Root Moto G9 Plus: Step by Step Guide

Moto G9 Plus was launched on 11 September, and it is a good device with promising specs. It also comes in the price range of under Rs 25000. In this thread, we are here to discuss how to root Moto G9 Plus. Before rooting, you will also need to unlock your bootloader. Well, you need not worry as we will also discuss how to unlock bootloader in Moto G9 Plus. Follow this guide carefully to Root Moto G9 Plus without any severe harms to your Smartphone. So without any further ado, let’s head into the article.
What is Rooting?

Before rooting, you must know what rooting is. We will briefly explain the whole concept of rooting for you. Rooting a device gives the administrator permission to the user. A user with a rooted device has full access to the device and can install custom ROMs and some applications that are not available for normal users. Rooting a device has its pros and cons like – having full access to your device, installing custom ROMs, etc. and disadvantages include voiding the warranty and boot loop sometimes.
Note: If you will not follow all the steps correctly or if there is some problem occur while rooting the device, then you will end up bricking your device. So, root your device at your own risk and only if you are pro at rooting.
How to Unlock Bootloader in Moto G9 Plus?
You will need to unlock the bootloader first, as mentioned above. So for unlocking it, we have mentioned the pre-requisites below:
Pre-requisites:
- Full Backup as unlocking will erase all the data from your device.
- ADB & Fastboot Drivers – DOWNLOAD
- Battery 75%+ (max. recommended)
Steps to Unlock Bootloader in Moto G9 Plus:
- Install ADB & Fastboot drivers on your PC.
- On your smartphone, head to Settings -> About Phone and there tap on “Build Number” 7-8 times to enable developer options.
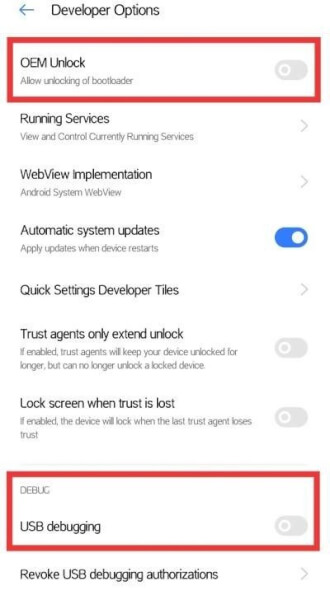
- Now go back to Settings -> System -> Developer Options and enable OEM unlocking and USB debugging.

- Now boot into fastboot mode by pressing the Volume down and Power button simultaneously.
- Connect your device to PC when in Fastboot mode.
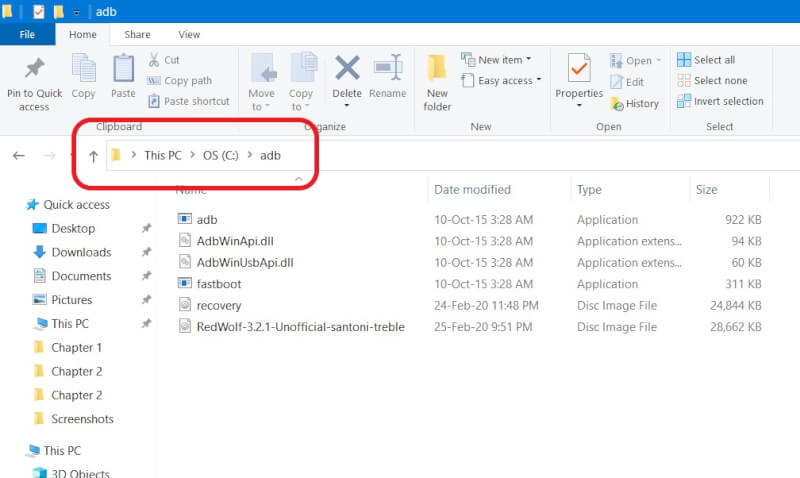
- Now open the command window in ADB & Fastboot Drivers folder by typing “CMD” in the location tab and hit enter.

- Enter the below command and hit enter to continue:
fastboot oem get_unlock_data
- Copy the five-line code and adjust it in a single line using any editor such as NotePad or WordPad.
- Now head to Motorola unlocking device, click next and login to the Motorola account.
- Click on “Can my device be unlocked” and then “Request unlock key”, make sure to select “I agree”.
- Then you will receive a code via email (Motorola ID). Copy the code and replace it with ‘code’ without inverted commas in below command and press enter:
fastboot oem unlock ‘code’
- The above command will unlock bootloader in Moto G9 Plus. It will unlock your device and erase the data on your phone.
How to Root Moto G9 Plus?
Now as you have unlocked the bootloader, now you can move ahead for rooting your Moto G9 Plus.
Pre-requisites:
- Unlocked bootloader.
- Full Backup to restore if anything gets wrong.
- 75%+ charging (max. recommended).
- Canary Magisk Manager – DOWNLOAD
- Moto G9 Plus firmware (same as device)
Steps to Unlock Bootloader in Moto G9 Plus:
- Firstly, extract the downloaded firmware and seek for the boot.img and copy it to your device storage.
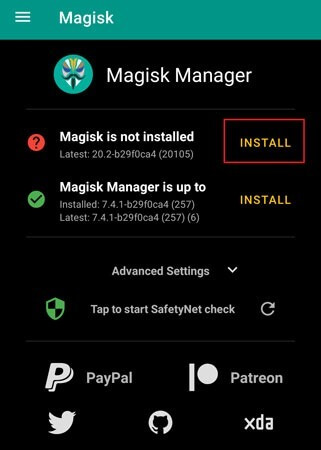
- Install Magisk Manager app on your device.
- Click on Install -> Install -> Select and Patch a file.

- Now locate and select the file boot.img that you copied from PC.
- The file will be patched and saved as magisk_patched.img.
- Copy the patched file in PC to C:\adb folder and rename the patched file to boot.img.
- Now reboot your device to fastboot mode and connect your device to your PC.
- Open the command window by replacing the location text with “CMD”.
- Enter below command to continue:
fastboot devices
- Now enter below command to flash the file you copied:
fastboot flash boot boot.img
- Now reboot your device and set it up. After completion, if it shows that Magisk is not installed then install the Magisk Manager app, complete the in-app instructions.
- Voila, you have successfully rooted your Moto G9 Plus.
That’s it guys for this post keep an eye out on TechBurner for the latest tech updates.
