How to
How to Show/Hide Files in Windows 11: Step by Step Guide

If you have used Windows, you may know that the operating system can hide/unhide any type of file. This way, regardless of the file type, you can easily hide the files in the explorer. The new Windows 11 also allows you to hide and show files. Although the process of hiding or showing files remains the same in Windows 11, users were not able to find this option due to the visual changes. Hidden files maintain the integrity of the operating system your system is running on. In fact, Windows intentionally hides essential files to avoid accidental errors from the part of the user. There are also files that you intentionally hide. In this article, we will show you all the ways to enable this feature and show hidden files and folders.
Hide Files and Folders in Windows 11
Well, hiding files and folders in Windows 11 is very easy. You do not need to use any third-party software or modify the registry to hide certain files/folders. Instead, you need to open file explorer, select files, and make changes.
- First of all, open File Explorer and navigate to the file or folder you want to hide.
- Right-click on a file or folder and select Properties.
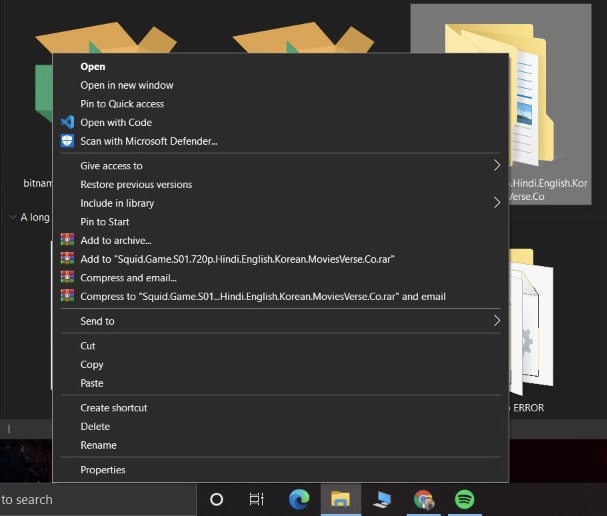

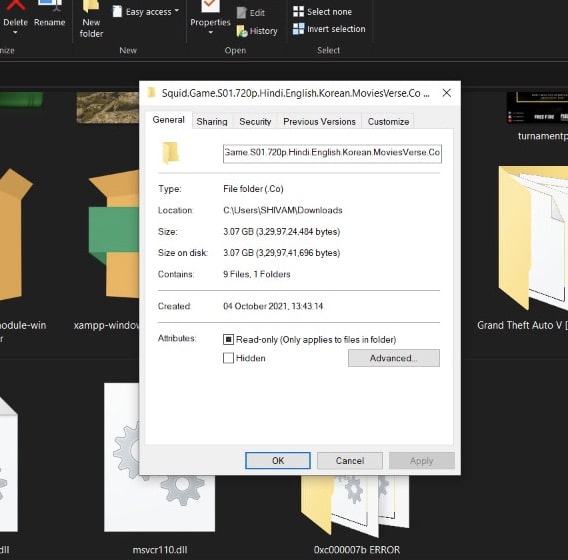
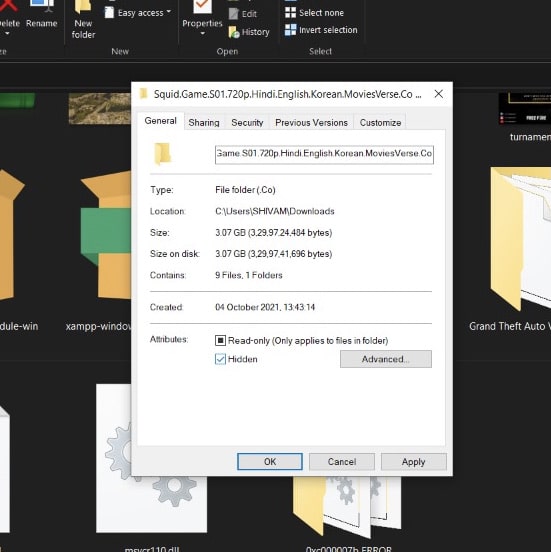
- In the “Properties” section, select the “Hidden” check box, then click OK.

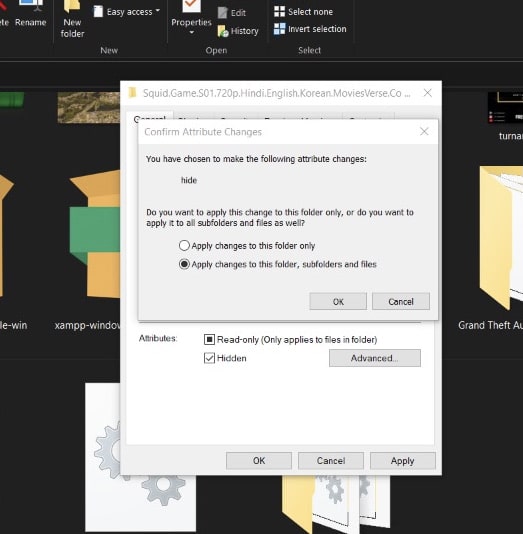
- You will be asked to confirm the changes made to the theme again in an additional window.

- Select Apply changes to this folder, subfolders, and files. Click here OK.

Show Hidden Files and Folders in Windows 11
After the file is hidden, you will need to follow some simple steps given below:
From File Explorer
- First, launch File Explorer from the taskbar. You can also open it by clicking the Start button and then clicking the installed file explorer icon. (Note that you can also find File Explorer by clicking Start and searching for or finding it under All Apps on Start.)
- Click on the three-dot button on the upper right side and then select Options.
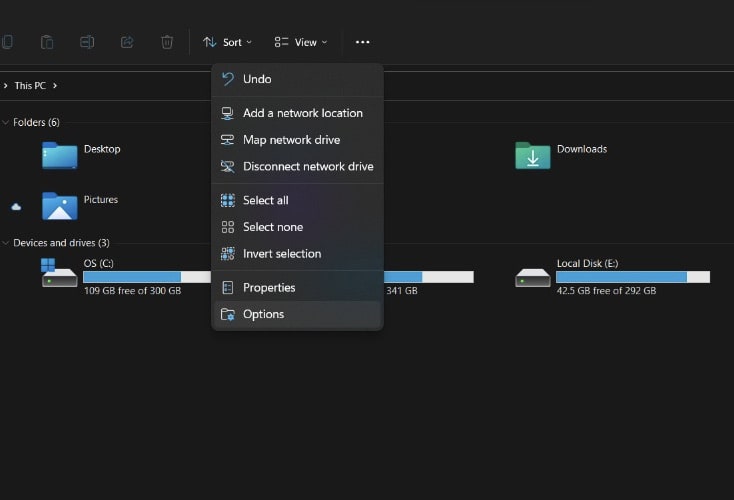

- In the Folder Options window that opens, click the View tab.
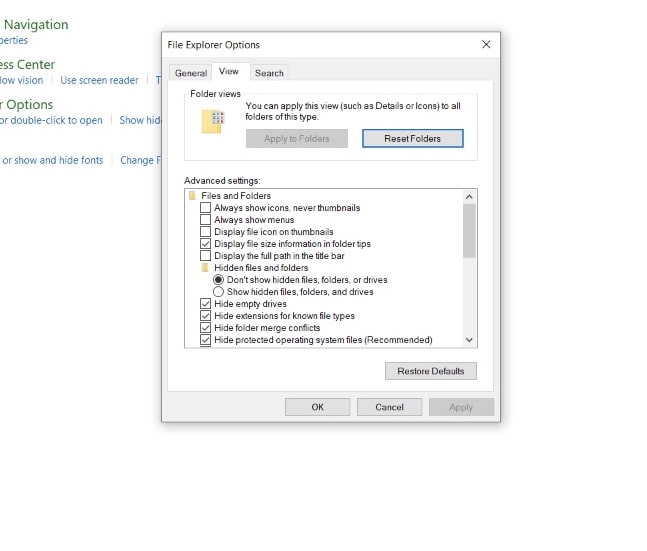

- In the “Advanced Settings” menu, find the “Hidden files and folders” option.
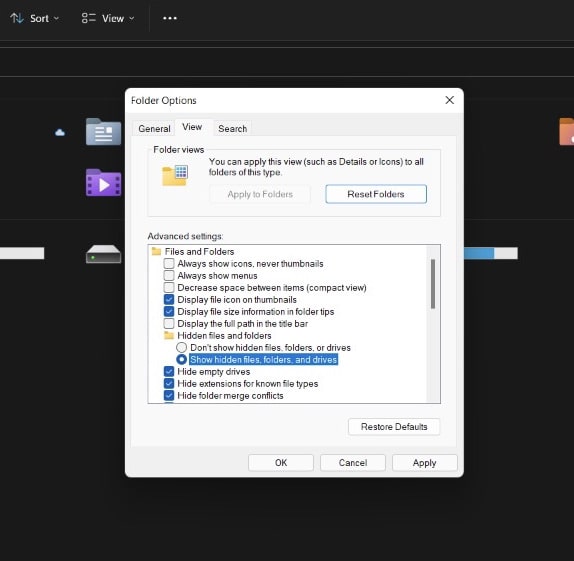

- Use the radio buttons to select Show hidden files, folders, and drives. Then click OK at the bottom of the window.
You will now see hidden folders and files that are not shown by default. Note that hidden folders and files are more transparent than regularly displayed items. This subtle visual cue helps you distinguish between what is usually hidden and what is not.
Using Control Panel
- Open Control Panel on your Windows 11 PC.
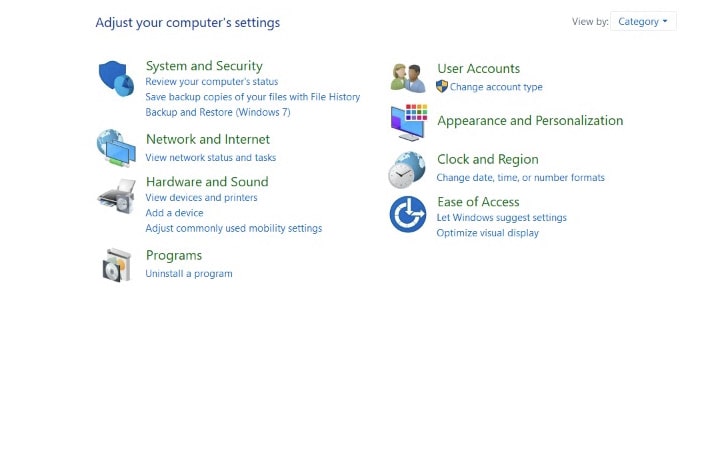

- Then click on Appearance and Personalization.
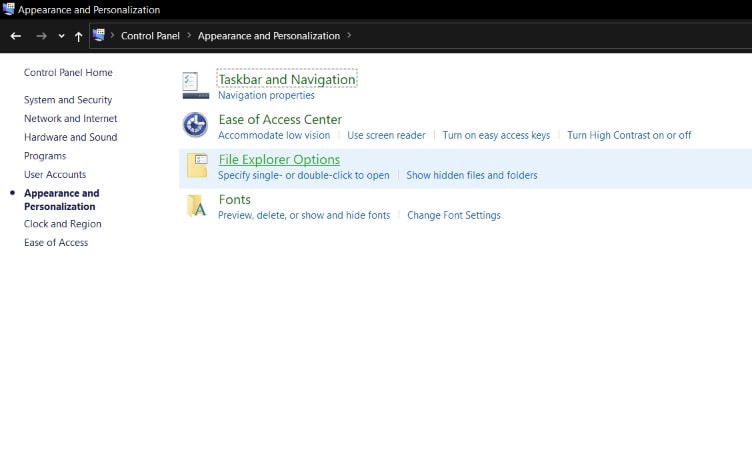

- Under Appearance and Personalization, click on File Explorer Options.


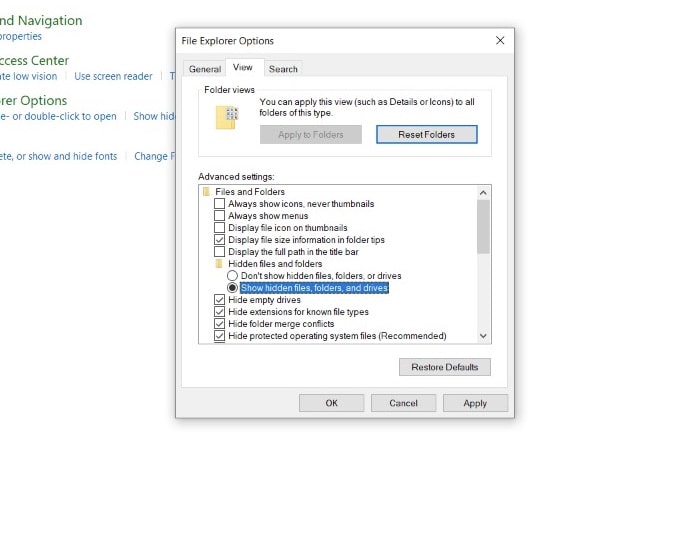
- In the Explorer Options pop-up, click the View tab.

- Now scroll down again and turn on Show hidden files, folders, and drives. Click OK to save your changes.

That’s All For Today. Stay Tuned To TechBurner For More Stuff.
