Bawal News
Top 3 Ways to Kill Not Responding Programs in Windows [GUIDE]

Although Windows 11 has been released to the public, it is not completely bug-free. If you are using the developer or trial version of Windows 11, you may encounter a lot of issues with the operating system. Sometimes, various processes or programs may become unresponsive, forcing you to restart. When the program you are using stops responding to your actions, it is most likely to crash. Unresponsive Programs are one of the most common types of crashes in Windows 11. The error message for an unresponsive program process reads “The application is not responding, do you want to end this process?”. In such cases, the shortcut to Kill Not Responding Programs in Windows can be very useful. Hence, in this article, we are going to share the best ways to Kill Not Responding Programs in Windows 11.
Kill Not Responding Programs in Windows 11
Sometimes you may encounter issues like “Programs are not responding”, taskbar freezes, Windows explorer restarts, etc.
In such a case, the last thing you can do is to Kill Not Responding Programs in Windows. As we all know to terminate a program, we use the task manager. You can kill them using a task manager, but sometimes even the task manager does not respond properly. That’s why here are some ways you can try to automatically quit or stop an unresponsive program in Windows 11.
Registry Editor
If any of your programs are not responding, you can change HungAppTimeOut in the Registry Editor.
HungAppTimeout: If no app or program responds within 5 seconds. Then this line will kill the program. However, you can increase the value to return the program to a working step. This way you can save your work.
Note: First, back up your registry in case something goes wrong and you need to restore it.
Here are the steps to do it:
- Press the Win + R key and open the Run window.
- Type Regedit and press Enter.
- Go to the following registry path: HKEY_CURRENT_USER \ Control Panel \ Desktop.
- Right-click on an empty space in the right pane. Choose New > String Value.


- Then create these strings if they are not available or change the value.
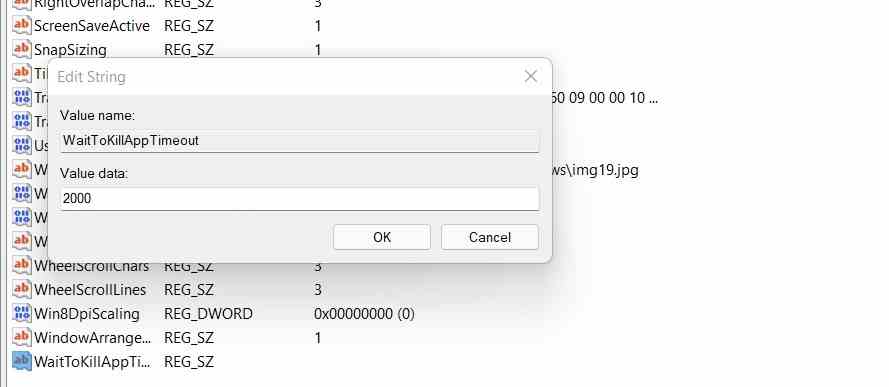

- WhiteTokillTimeout = 2000
- AutoEndTasks = 1
- HungAppTimeout = 1000
- Lowlevelhooktimeout = 1000
- Double-click on a row, add a value, then click OK.
- Now you will need to repeat the same process for all lines. Then restart your computer and go to the next steps. That’s it.
Then, Windows waits about 5 seconds for the background services to automatically terminate the program. However, if you think it is taking more time, you can set the registry value by following the method below:
- Open Registry Editor and navigate to the following path: HKEY_LOCAL_MACHINE\SYSTEM\CurrentControlSet\Control.
- Locate the WaitToKillServiceTimeout line and double-click it in the right pane.
- Then you can change the value. Since the time is in milliseconds, be sure to change it accordingly.
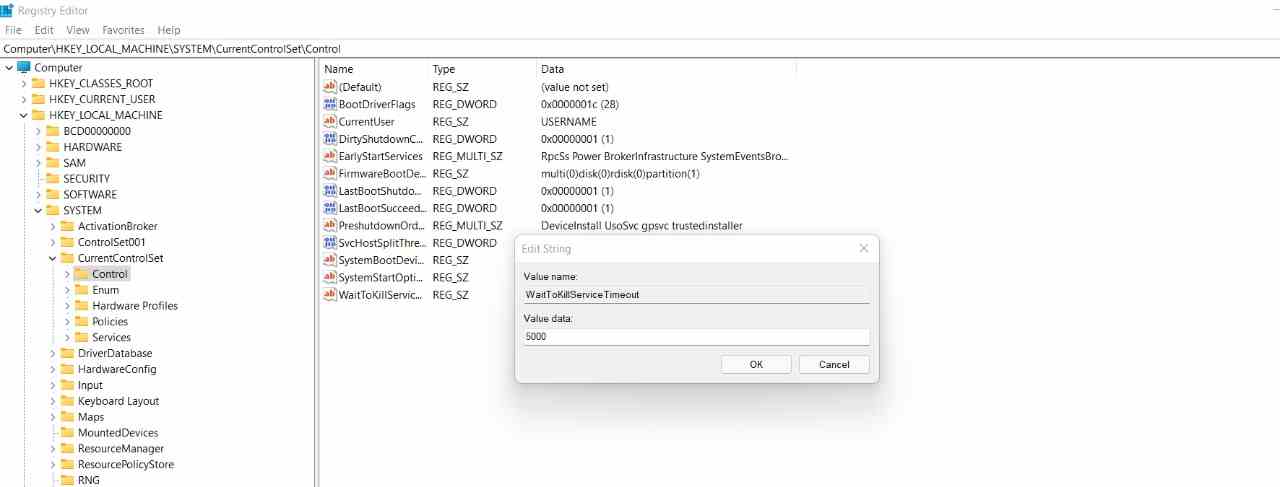

- Press the “OK” button and exit.
When a program enters the “Not Responding” phase, this ensures that Windows closes the program automatically without a long wait.
Taskill
You can also use the built-in Taskkill tool. This software helps to kill programs and processes from the GUI using the task manager. It also kills programs from the command line, here’s how to use it:
- Open the Run prompt with Win + R. Then type wt and press Shift + Enter to launch Windows Terminal.
- In the Windows terminal, type task list and press Enter to display a list of all programs and services running on your computer.
- To terminate the program immediately, run the following command: taskkill /IM program.exe.


- It is possible to force quit the program if Windows is unable to do so. To do this, you need to run the command taskkill /F /IM iexplore.exe.
- In addition, you can close multiple processes at the same time. You have to add the PID numbers of all processes one by one using a space. If you want to close multiple processes at the same time then type: Taskkill / PID 1212 1280 1308 / F
Desktop Shortcut to Terminate Unresponsive Programs
Desktop shortcuts aren’t just for running a program. You can also add shortcuts to the desktop that run command-line commands. That shortcut will kill all unresponsive program processes in Windows 11. Here are the steps to set up a desktop shortcut to execute this command:
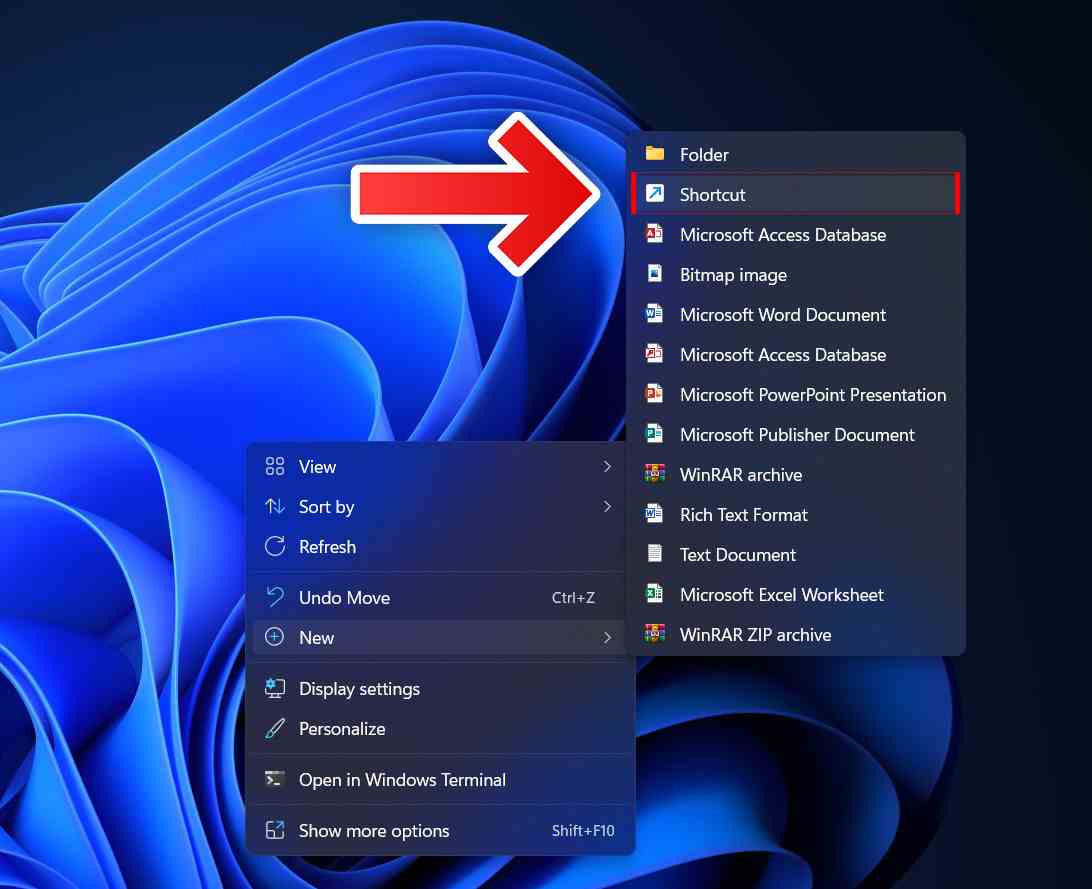
- First, right-click on an empty space on the desktop and select New > Shortcut.

- In the “Create Shortcut” window, enter this command in the Location field:
Taskkill.exe /f /fi “state equalizer not responding” - And click the “Next” button.


- Type Task Kill in the text box and click Finish on the next screen.
- Right-click on the shortcut to add an icon to it and select Properties.
- Select the appropriate icon and click OK.


- Click Apply to save changes.
You can assign a global shortcut key to the Task Kill shortcut on the desktop just like any other shortcut. Thus, you can activate the Task Kill command to terminate all unresponsive program processes using the Ctrl + Alt key combination when needed.
To do this:
- Right-click on the shortcut and select Properties.
- Click in the “Shortcut” field in the “Kill Task Properties” window.
- Press T (for a task) to set the global hotkey Ctrl + Alt + T.
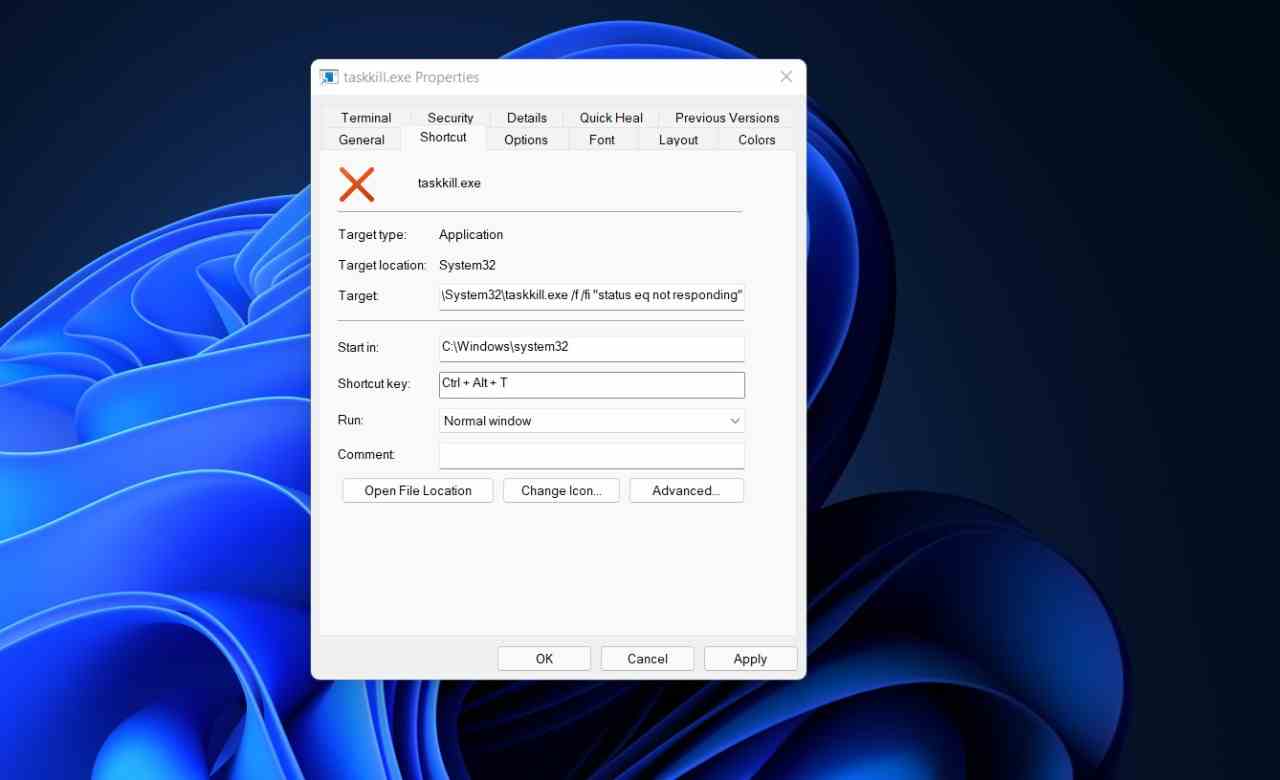

- Then select the “Apply” and “OK” options.
You definitely can’t try this shortcut without ending any unresponsive software processes. However, you can click this desktop shortcut to quickly terminate unresponsive processes when the program freezes.
