Snapseed is one of the best photo editing apps which you can use to edit your photos. It makes the images more dramatic and cool. However, we all are tired of usual photo editing just by tweaking with saturation and exposure. There are several tools available in Snapseed, and with the help of them, we can make the photos amazing! Today we are going to use Double exposure to make photos unique and exciting. In this tutorial, we are going to tell you how to edit photos with Neon Glowing Effect in Snapseed. Without further ado, let’s straight jump into the tutorial.
How To Edit Photos with Neon Glowing Effect in Snapseed
Follow these simple steps to add Neon Glowing Effect in your photos using Snapseed app.
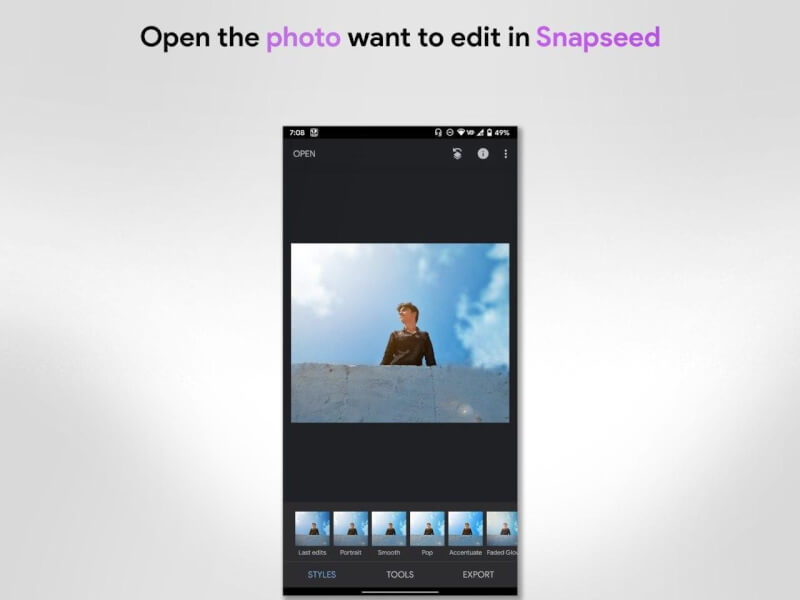
1. Open the photo in Snapseed
2. Search for Glow Colour Trail on Google
Now, search Glow Colour Trail or Neon Glow Trail on Google. Find an image which you like the most and save the image.
Click Here to get some Neon Glowing Effect images.

3. Select Double Exposure
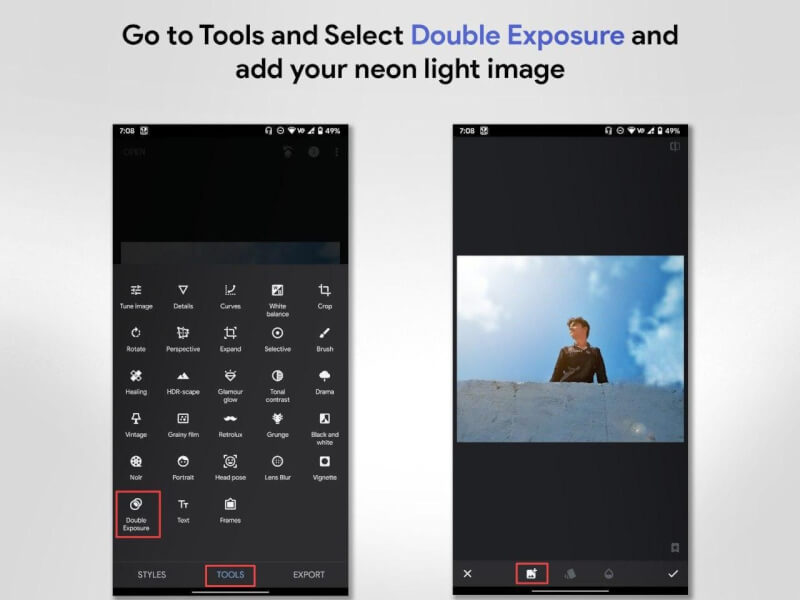
- Open Snapseed and Select Double Exposure.
- Now, select the Neon Light image which you have saved.
4. Place the Image around the Subject
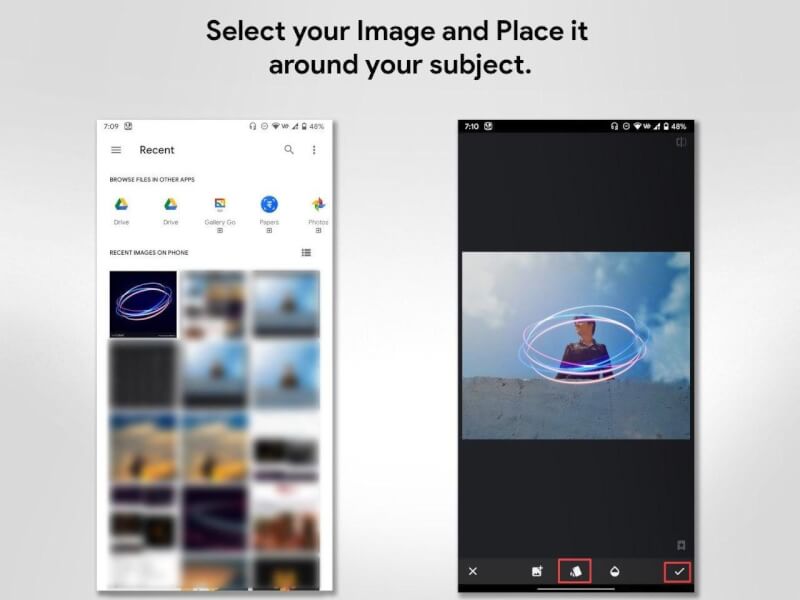
- Select the Neon Light image from your phone.
- Place the image over your subject.
5. Edit the Image
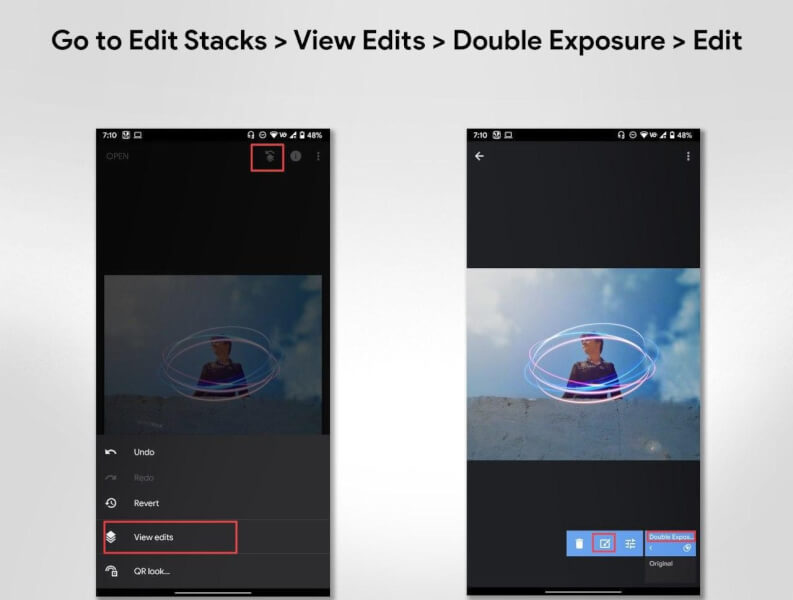
- Now, click on Edit Stacks > View Edits.
- Select Double Exposure.
- Click on brush icon.
Read More | Professional Portrait Photo Editing Tips
6. Erase the line from the Subject
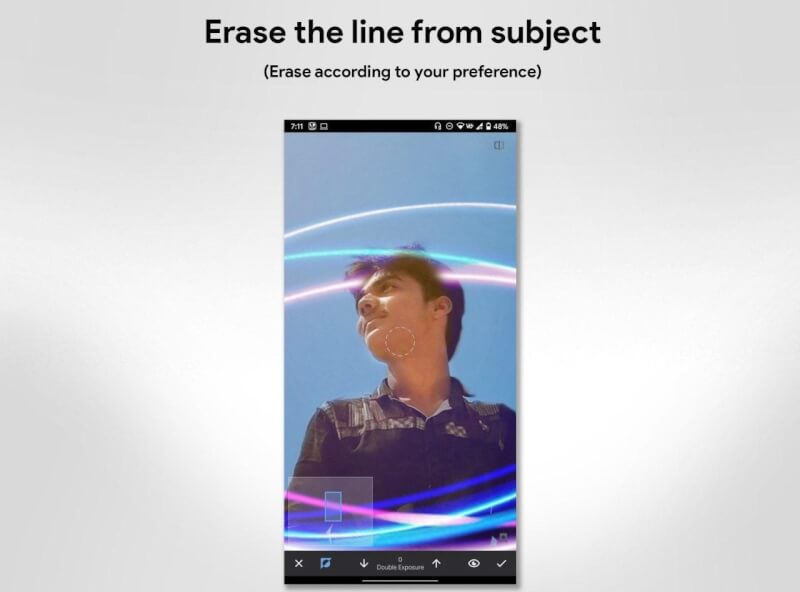
- Now, erase the Neon Glowing Light from the subject according to your preference.
- That’s it. You have edited your photo with cool looking Neon Glowing Effect.
Follow @techburnerteam on Instagram for more Burning Tricks.
Also, check out: How To Get Teal & Orange Effect in Mobile [Tutorial]
https://www.instagram.com/p/B_bgKMQgKsa/?utm_source=ig_web_copy_link
That’s all in this article. Stay tuned with TechBurner for more updates.