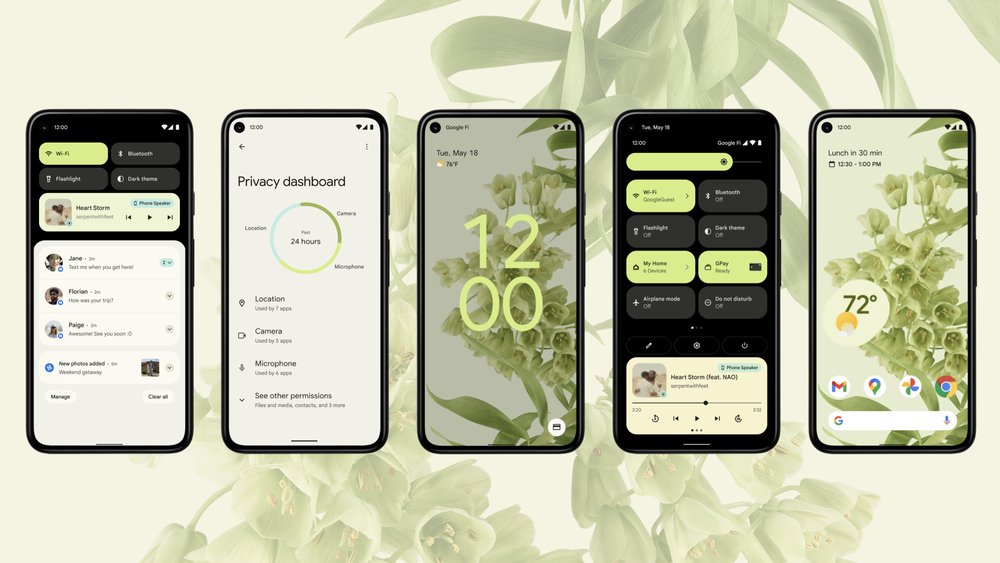
Google’s Android 12 is finally official now. Google was already involved in the Android Open Source Project (AOSP) since the beginning. In addition to Pixel devices, top Samsung and OnePlus flagship phones are also eligible to use the latest version of Android as part of the beta testing program. Android 12 comes with a new user interface, smart features, improved UX design, circularity, and many security improvements over the previous version of the Android operating system. Apart from these, a great way to experience Android 12 is by Flashing a Custom ROM on your device. In this article, we will list some of the Android 12 Custom ROM and the Android 12 ROM Supported Device List. Also, we will discuss how to install Android 12 Custom ROM on your device. So, without any further ado, let’s get started.

Best Android 12 Custom ROMs
There is currently no dedicated firmware for many Android 12 devices. Currently, you can only get the Android 12 Beta GSI package for non-Pixel Android devices with Project Treble support. You will find:
- AOSP Android 12 ROM for OnePlus 5
- Android 12 Beta Port for Samsung Galaxy J7 2016
- AOSP Android 12 for Redmi Note 8/8T, 10 Pro/10 Pro Max, K 20 Pro, and other Xiaomi Mobiles too.
Once Google releases the official stable version of Android 12 in general along with the AOSP 12 source code to developers, more and more custom ROMs will start landing for the Android community.
Android 12 Custom ROM Features
Android 12 is a successor to the previous generation Android 11, which was released last year. Google is scheduled to release the highly anticipated official stable version of Android 12 in Q4 this year. Just like previous trends, when the release becomes stable enough for general use around the world.

Well, at least we now know what features or improvements are in the works. Let’s have a quick look at the Android 12 Custom ROM Features that we will see:
- Improved UI
- New Power Menu
- All new Emoji’s
- Wifi Password sharing by Nearby Share
- Dynamic themes
- Haptic-coupled audio effect
- One-handed interface
- Improve privacy and security measures
- New widgets for the home screen
- Software updates via Google Play
- Improved backup and recovery
- Blurred photos, colour filters, and other effects
- Microphone and camera indicators
- Protected actions with lock screen notifications
- Optimize Bluetooth permissions
- All-new privacy panel
- Enhanced Picture-in-Picture (PiP)
- Improved navigation with gestures for immersive mode
- And much more…
How to Install Android 12 Custom ROM on Your Device
Installing Android 12 Custom ROM on your Phone is not an easy task. This can even cause to lose your data. Also, your device should be in the Android 12 Custom ROM supported device list. If your device passes all the checklists, you are ready to follow the following steps:
1. First, back up all the data on your device.
2. Next, you will need to unlock the bootloader on your Android device.
3. Download and install Android SDK Platform Tools. This will provide you with all the binaries you need.
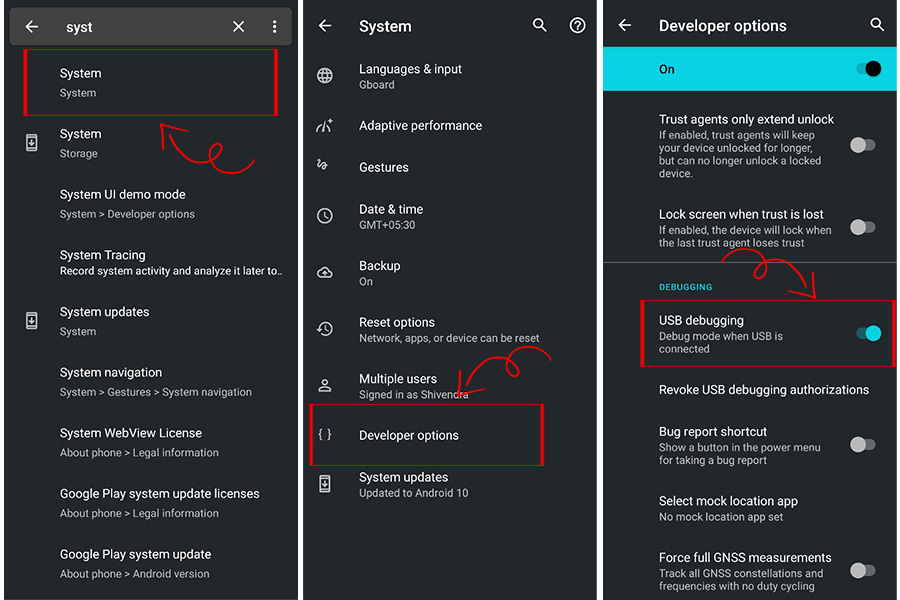
4. Enable USB debugging on your device. This will make your device recognizable to your computer in ADB mode. After that, go to Settings > About phone > tap Build number 7 times > Go back to Settings > System > Advanced options > Developer options > Enable USB debugging.

4. Now, download and install USB drivers for your device. Similarly, download Android USB Drivers for Windows and Mac.
5. Your device must have TWRP installed. This is required to install the custom ROM for Android 12 AOSP. So refer to our guide to the TWRP Recovery firmware on any Android phone and install the mentioned custom recovery right away.
6. Also, not all ROMs come with Google apps pre-installed. If your ROM is on this list, you will have to download the GApps package separately and then transfer it to your device.
How to Flash Android 12 Custom ROM on Your Device
- Transfer the downloaded AOSP custom ROM to your device. Then connect it to your computer via a USB cable.
- Go to the platform-tools folder, type CMD in the address bar, and hit Enter. This will launch the command line.
- Now enter this command “adb reboot recovery” to boot your device into TWRP Recovery.
- When your device boots into TWRP, go to Wipe. Then click on Advanced Scan and select Dalvik Cache, System, Vendor, and Data. Swipe right to clear selected partitions.
- Once this is done, go back to the TWRP main screen and select Install. Then go to Android 12 AOSP Custom ROM and select it.
- Swipe right to flash this file. When you’re done, go through the installation again and this time flash the GApps package (optional).
- You can now restart your device to Android OS. To do this, go to the “Reboot” section and click on “System”.
That’s All For Today. Stay Tuned To TechBurner For More Stuff.