How to
How to Enable Stickers on Windows 11
It has been a long time since Windows 11 was launched and Microsoft has been working on many new features. Recently, tipster Albcore noticed the desktop background stickers on Windows 11. The feature is not available right now by default but you can manually enable it. In this article, we are going to discuss how to enable stickers on Windows 11. You just have to follow some easy steps in order to enable the desktop background stickers. However, the Windows 11 Version 22H2 has started rolling out but they have assured that it has reached the Released to Manufacturing (RTM) stage. Through this feature, you can add stickers to your Windows 11 desktop. If your Windows 11 PC or laptop is on build 22621 or newer then you can enable this feature easily. Here’s how to enable stickers on Windows 11.
How to Enable Stickers on Windows 11
Before you go any further you have to make sure your PC or laptop is on build 22621 or newer. Otherwise, you might face difficulty in enabling the desktop stickers feature. Here’s what you have to do:
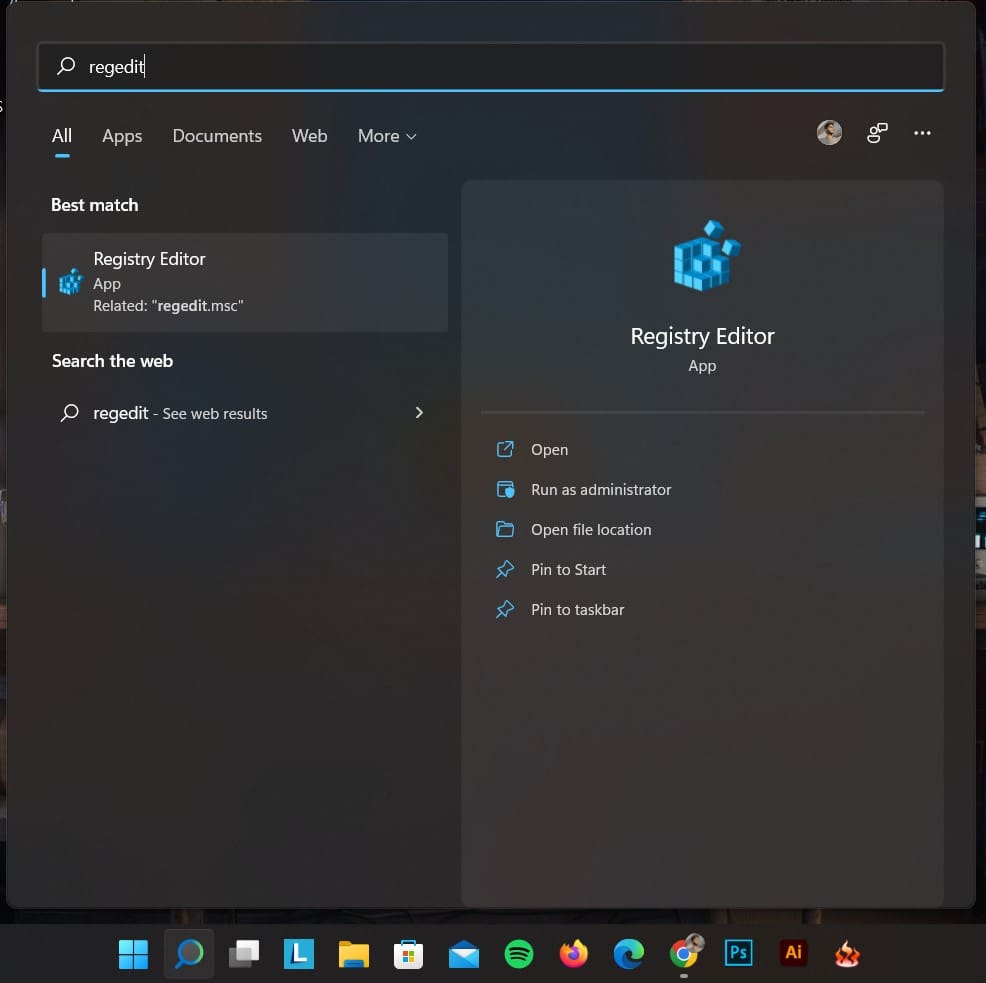
Step 1: Open Start Menu on your PC or laptop, then search for regedit and open the first app that comes up.
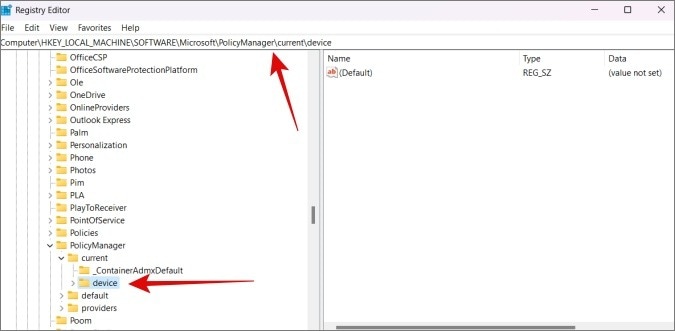
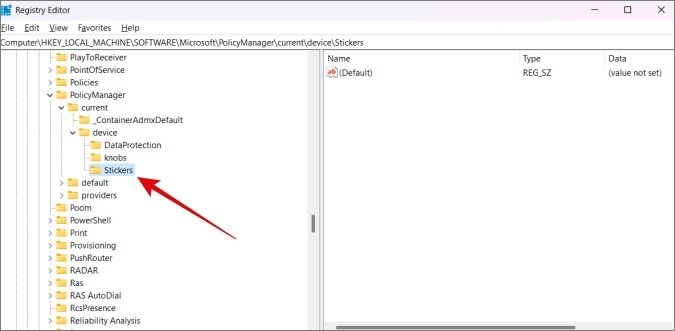
Step 2: Now follow the path carefully that we are going to tell you on the left pane,
HKEY_LOCAL_MACHINE\SOFTWARE\Microsoft\PolicyManager\current\device
Credit: TechWiser
NOTE: You can also just copy-paste this into the address bar in Registry Editor.
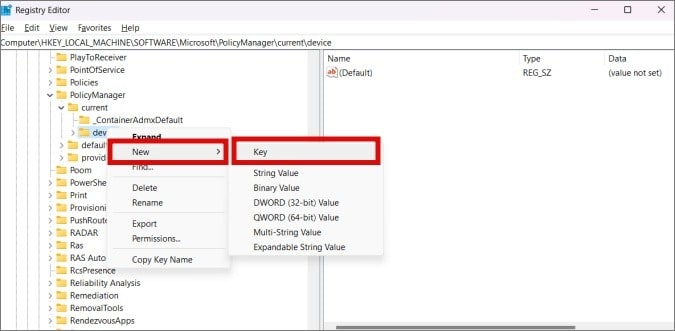
Step 3: Right-click on the Device directory and then select the New -> Key option to create a new registry.
Credit: TechWiser
Step 4: Once you have created a new registry name it Stickers and double click it.
Credit: TechWiser
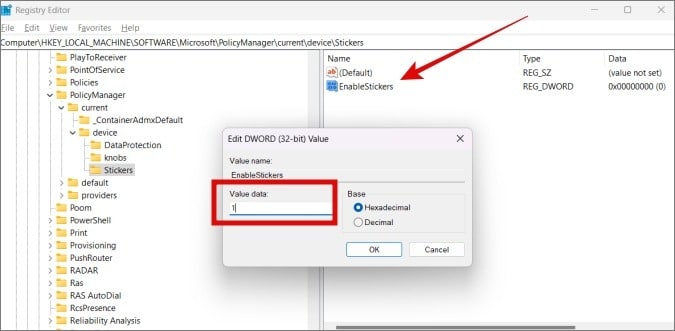
Step 5: Now on the right pane, right-click anywhere and choose New -> DWORD(32-bit) Value.

Credit: TechWiser
Step 6: Name the value EnableStickers and double click on it.
Step 7: After that set the value to 1 and click OK. Now you have to restart your PC or laptop, after which you will be able to see the option to place a Sticker on the desktop.
Credit: TechWiser
How to Add or Remove Stickers on Windows 11 Desktop?
Step 1: Right-click on your desktop where you want to add the sticker. Now choose the Add or edit Stickers option. You can also access that by going to Settings -> Personalisation -> Background -> Choose Stickers for your desktop.
Step 2: Now you will see Sticker Menu from where you can choose and add any sticker you want.
Step 3: Scroll down or search stickers according to your preference that you want to add to your desktop.
Step 4: After you have made your selection you will notice that sticker will be placed on the top left corner of your screen. All you have to do is click on the sticker to move it around or resize it.
Step 5: For any reason, if you want to remove the sticker all you have to do is click on it while you are in the editor interface. A Trash Can icon will appear on the bottom of the sticker click on it and the sticker will be deleted.
Can you Create or Add your Own Custom Stickers?
As for now, there is no option available that will let you create or add your own stickers for the desktop. But we can assume that as soon as this feature is available to everyone by default. Microsoft will also release a Custom Stickers feature in future updates. So, we have to wait till there is any news given by Microsoft.
Conclusion
So, this is how you can enable stickers on Windows 11. Just follow all the steps in order to enable the feature manually. Some users might find it difficult to enable the feature on their Windows 11 PC or laptop. Microsoft has been testing many more new features and soon we can get to see some of them. We will tell you guys the moment we get anything on the latest Windows 11 features.
That’s All For Today. Stay Tuned To TechBurner For More Stuff.