Windows 11 brings a brand new look and feel your laptops on a daily basis. There are a couple of fresh changes as well as customization options to look for. One such tip which we’ll be discussing in today’s article is how to move Windows 11 taskbar to the top of the screen. Many of us prefer this type of layout where the taskbar is located at the top of the screen. It is quite suitable for people who are switching from a MacBook since Apple’s taskbar is located at the top by default. Windows 11 doesn’t let you relocate the taskbar as per your preference. Let’s see how to move Window 11 taskbar to the top of your screen!
Move Windows 11 Taskbar To Top Of The Screen: Step-By-Step Guide
In order to move Windows 11 taskbar to the top of your screen, you have to make some changes in the Windows Registry. Although manually editing the Windows Registry can be tricky business, if you follow our steps carefully, it will be absolutely fine.
- First step is to open the RUN dialog box which you can do so by pressing Windows Key + R button. In the text box, type “regedit” and press Enter.
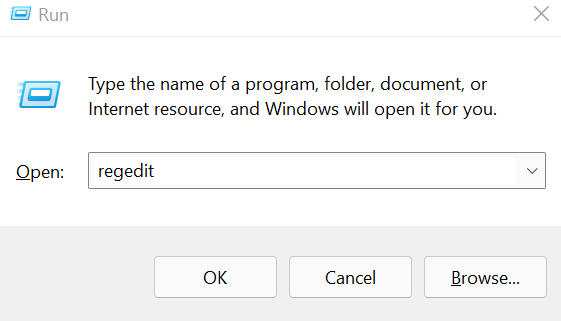
- Allow the Registry Editor application to make changes to your device by clicking on “Yes” when the popup appears.
- The Registry Editor box will now open up. Paste the following path in the address bar near the top of the window-
Computer\HKEY_CURRENT_USER\Software\Microsoft\Windows\CurrentVersion\Explorer\StuckRects3
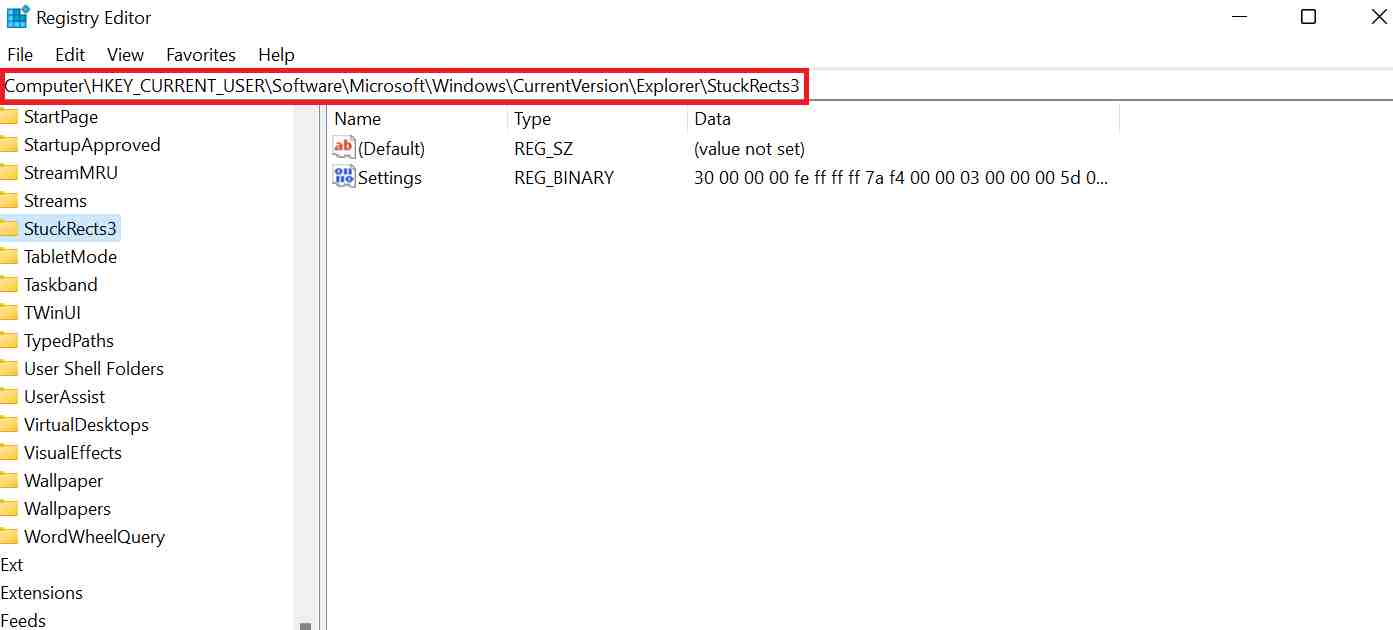
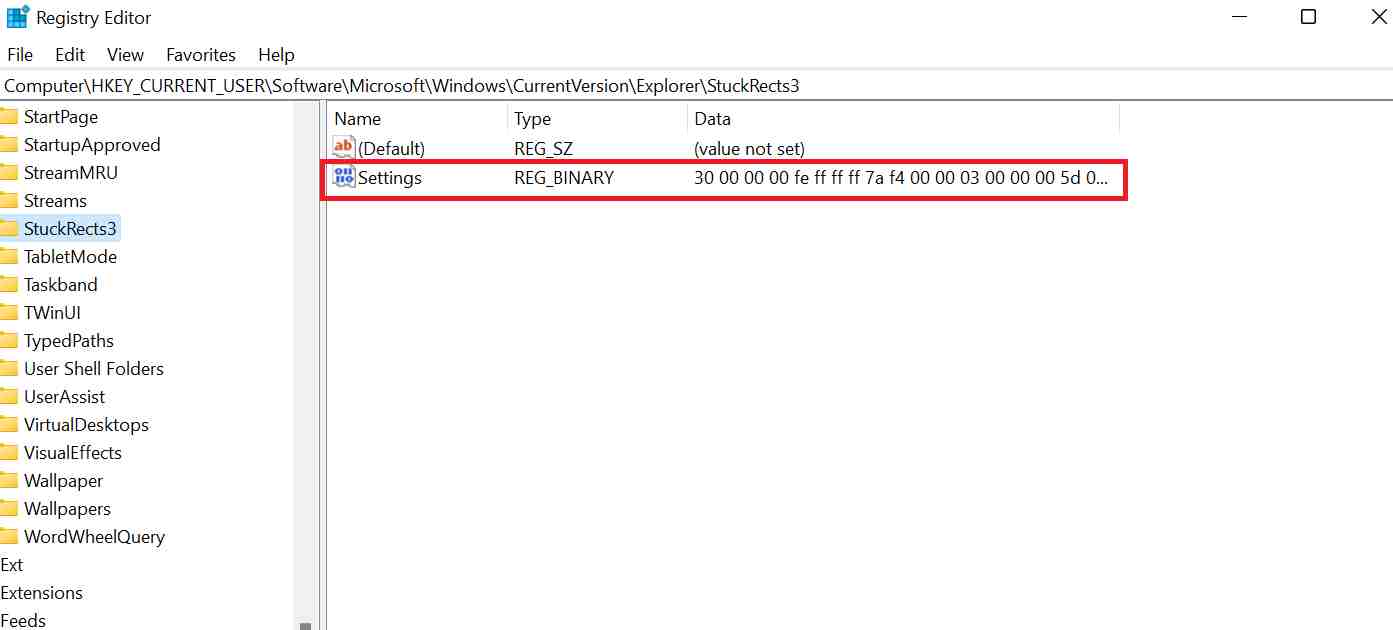
- Once you have located the “StuckRects3” key, double click on the “Settings” key in the right side pane.
- Now, a dialog box by the name of “Edit Binary Value” will open up. Here comes the most crucial part of this entire tutorial. You have to select the second row’s fifth value from the left and modify it. Be very careful while you make the selection. By default, this value is set to “03.” You have to select the value by clicking on it once, pressing backspace and finally changing it to “01”.
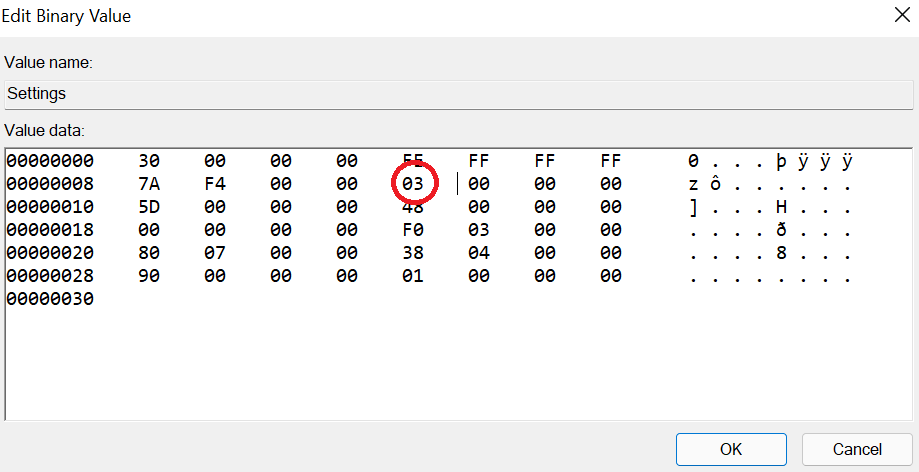
- Once you have changed the particular value from “03” to “01”, click on “OK”.
- You may close the Registry Editor now and restart Windows Explorer. To do so, press Ctrl + Shift + Esc which will open up the Task Manager. Next, go to the Processes tab and locate “Windows Explorer” from the list. Right-click on it and select Restart.
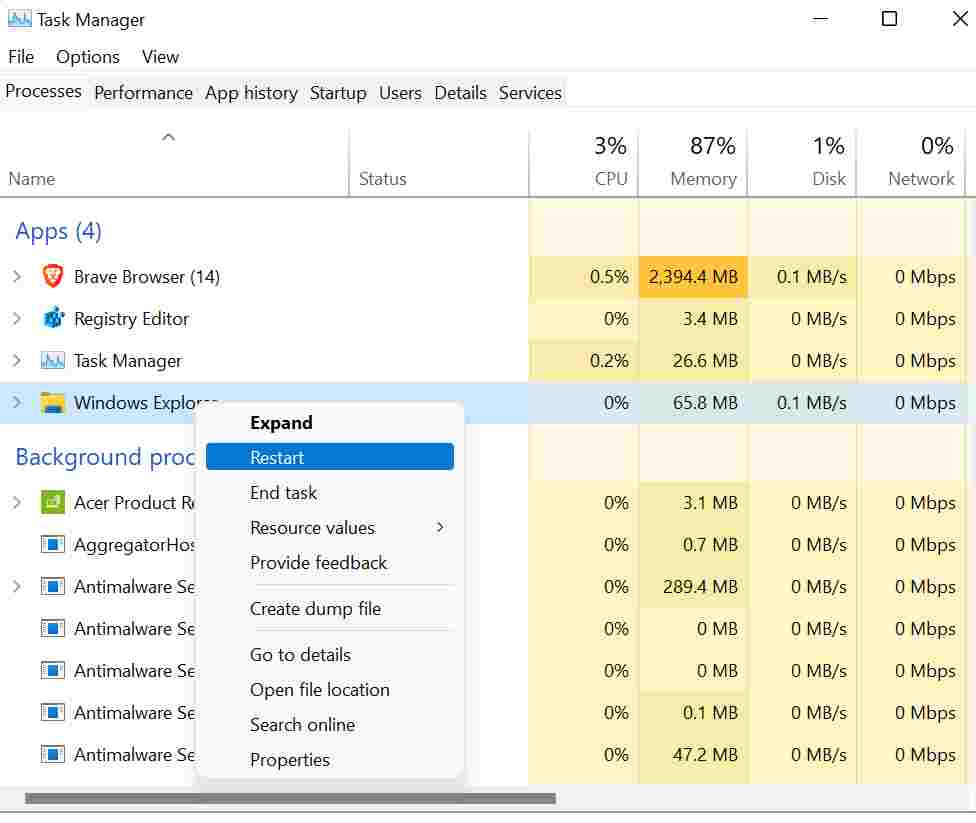
After your PC restarts, your taskbar will be at the top and that’s how you move Windows 11 taskbar to the top of your screen. If at any point in time you feel like relocating the taskbar to the bottom of your screen then simply follow all the previous steps and change the value back to “03” from “01” in the Windows Registry.
That’s it for this one. For more useful tech tips and tricks, stay tuned to TechBurner!
Join our Telegram channel for more updates!