How to
How to Clean Up Storage after Upgrading to Windows 11
It’s been months since Windows 11 was officially launched and almost everyone has upgraded from Windows 10. If you have recently upgraded to Windows 11 then you might have noticed suddenly storage space has been taken up. You might want to free up some space on the disk to use the latest Windows 11 without any issue. In this article, we are going to tell how to clean up storage after upgrading to Windows 11. We are going to share two methods through which you can clean up your disk space easily. We are also going to tell you the reason why disk space gets filled up suddenly after upgrading to Windows 11. Read the article till the end and free up your PC’s disk space for better performance. Windows 11 comes with a feature that allows you to clean up disk space, but finding it is a little confusing.
Why does Disk Space gets taken after Upgrading to Windows 11?
The reason behind why this happens is pretty simple, Windows has to keep system files for old Windows installations. In this way, if you run into any problems after installing an update you can roll back to Windows 10 without any issues. However, if you don’t have any issues those files are just taking up space on your disk. So, it’s better to remove the files after upgrading to Windows 11. But remember after you have deleted those files you won’t be able to roll back to the older version of Windows. So, if you are confident enough that things are working well on your PC after upgrading then only deleted those files. There are two methods through which you can clean up your disk storage. Just follow some simple steps and you will be done with the cleanup.
How to Clean Up Storage using Settings App?
Here’s how to clean up storage using the settings app after you have upgraded to Windows 11:
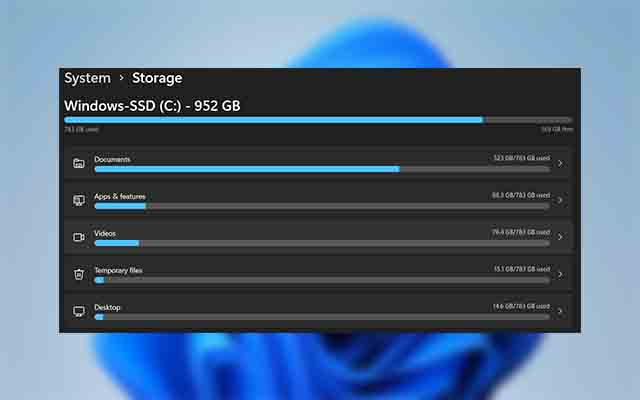
Step 1. Open Settings on your PC or laptop.
Step 2. Now scroll down and click on the Storage option. It will take some time to show all the data.
Step 3. After the loading is complete click on the get Temporary files option.
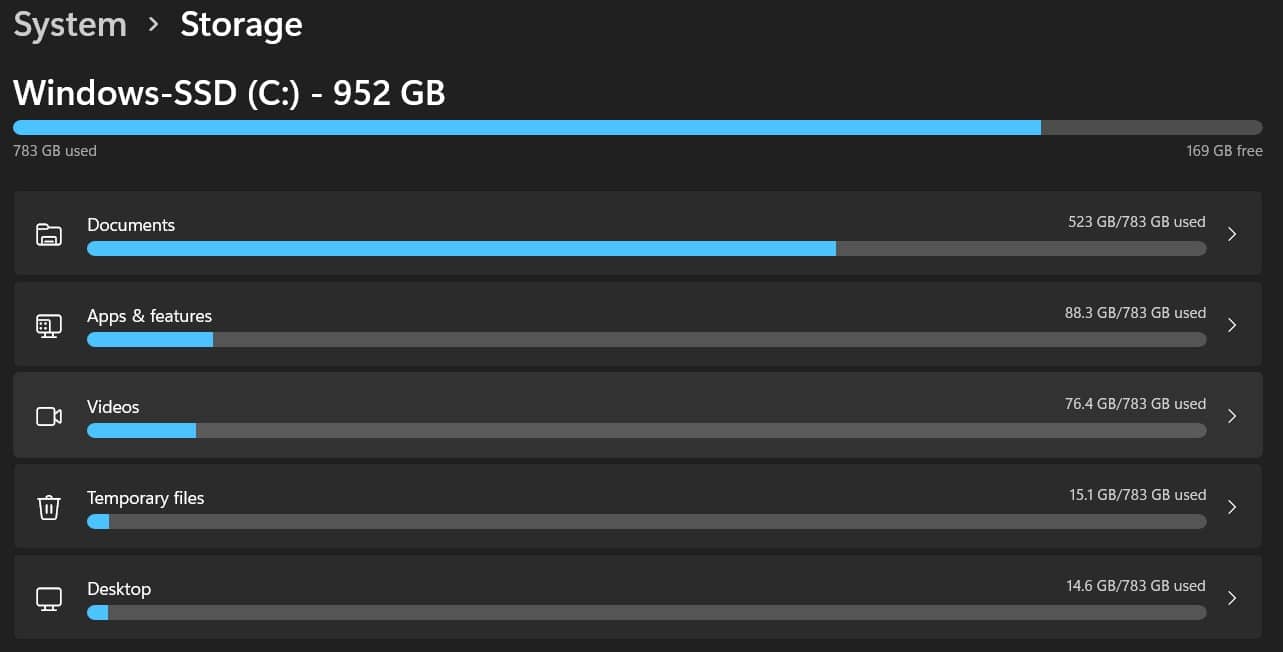
Step 4. Look for an option called Previous Windows Installs and click on the box next to it. The file size should be about 10GB at least.
NOTE: Before going any further remember to uncheck all the other boxes, or all your data will be removed permanently.
Step 5. Now click on the Remove Files option at the top of the list. It will take some time to complete the process, but after it’s complete you will notice there is now some extra storage available.
How to Clean Up Storage using Disk Cleanup?
Here’s how to clean up storage using Disk Cleanup:
Step 1. Open Start Menu and search for Disk Cleanup app.
Step 2. It will take some time to load up all the details, after the loading s compete you will see all the types of files that can be deleted.
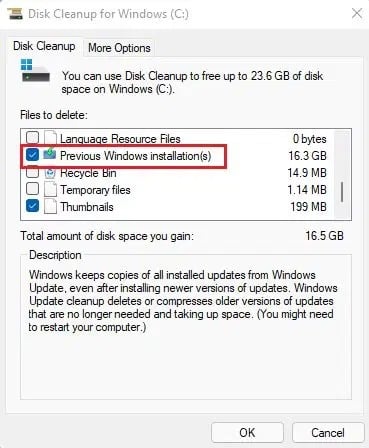
Step 3. Now click on the Clean Up System Files option. You have to wait sometime and will show you the system files that can be deleted.
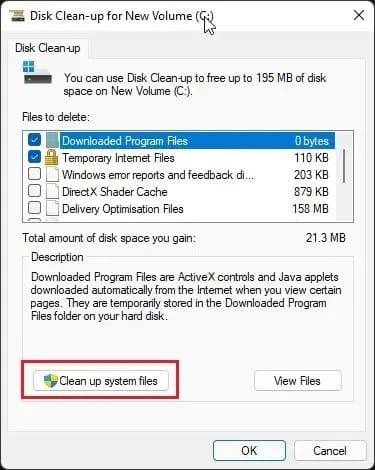
Credit: Beebom
Step 4. After the loading is complete select the Previous Windows Installation(s).
Credit: Beebom
NOTE: Make sure you have unchecked other options before proceeding any further.
Step 5. Click on the OK to delete the files and you are done.
Step 6. After the process is complete you will see there is no more storage space available.
Conclusion
If you were looking for a way to delete those unnecessary files, then you are at the right place. We have shared two methods through which you can clean up your disk storage in a few simple steps. Just go through all the mentioned methods in order to clean up taken space. Sometimes when you update your PC with the latest versions, there is a chance that you might face some problems. The one solution is to find the solution or if nothing is solving the issue you can roll back to the previous version. However, you have to remember that you can only downgrade to Windows 10 within 10 days of your upgrade. After that, you won’t be able to roll back.
That’s All For Today. Stay Tuned To TechBurner For More Stuff.