Tech Tips
How To Record Your Screen On Windows 11
Microsoft’s latest Windows 11 brings a fresh new interface that has been liked by many. There are a lot of new features as well as some tweaks to the older Windows versions. One such feature of Windows 11 is screen recording which comes in quite handy. Whether it is recording your gaming clips or important lectures, Windows 11 native screen recording feature has got you covered. If you’re still wondering how to record your screen on Windows 11, this article is for you. We are going to discuss two native methods of how to record your screen on Windows 11 without using any third-party software. So, let’s get straight to the tutorials.
How To Record Your Screen On Windows 11 (Natively)
Using Xbox Game Bar
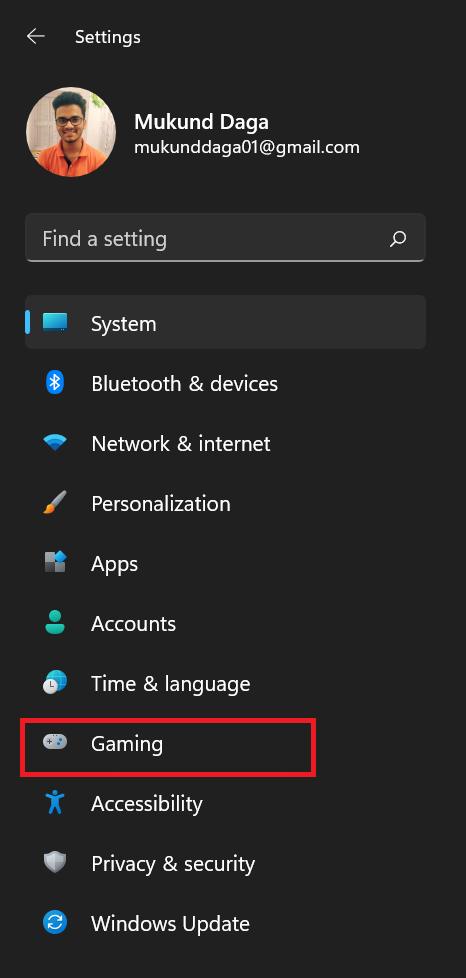
- First up, press the Windows Key + I button to open the Settings App on your PC.
- From the list of options available in the left pane, select Gaming.
- Now, click on the Xbox Game Bar option.

- In the screen that follows, check the toggle next to “Open Xbox Game Bar using this button on Controller.”
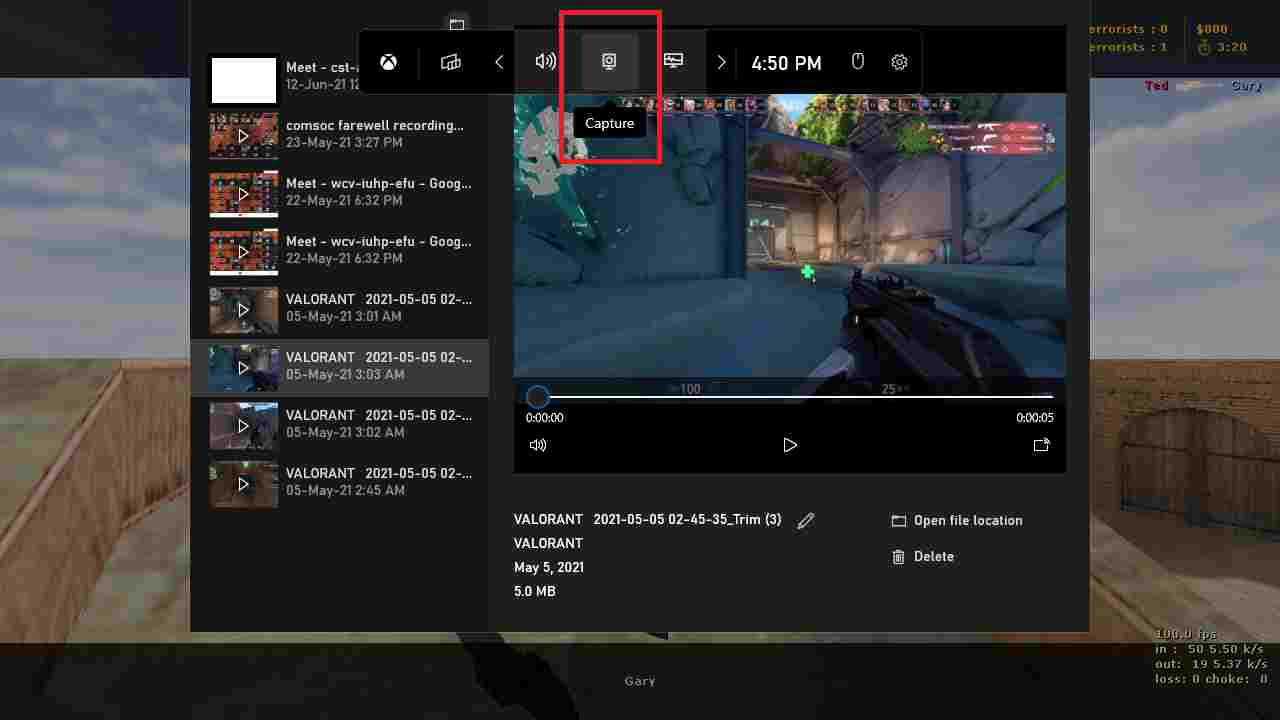
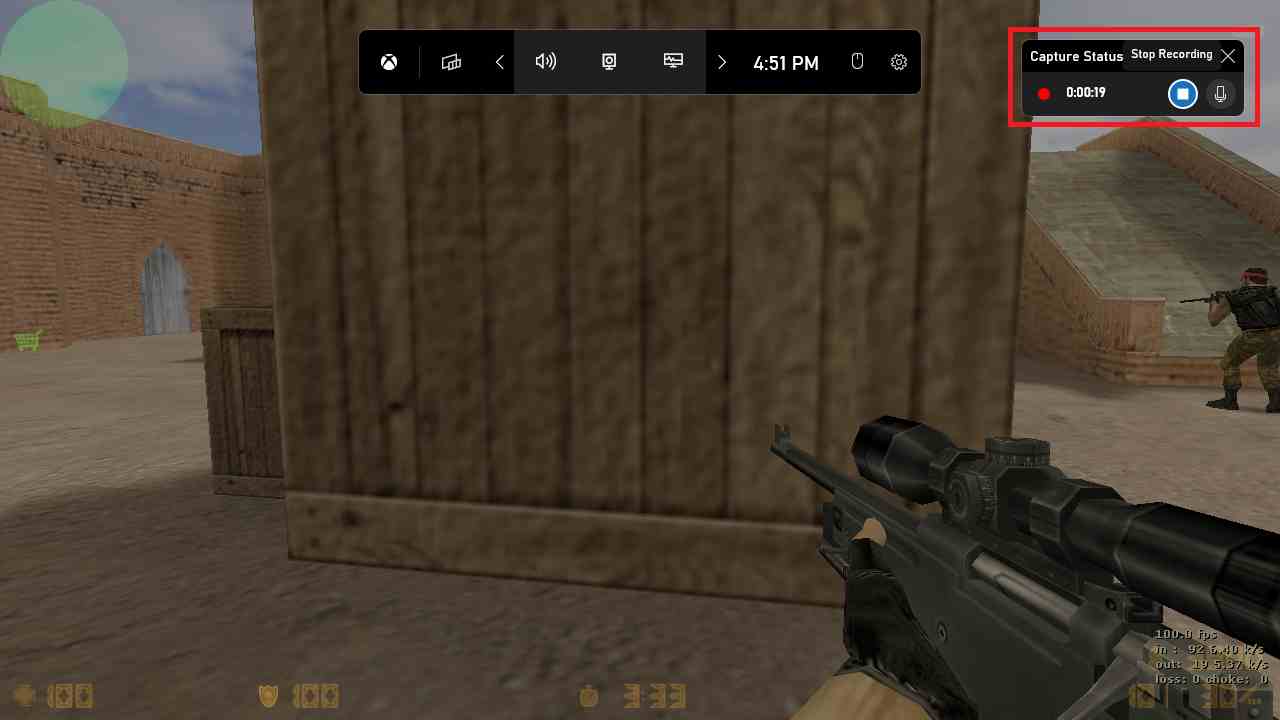
- Now, the shortcut button for screen recording via Xbox Game Bar has been activated. All you need to do is press Windows Key + G to activate the menu.
- In the Capture pane that follows, click on the Start Recording button as shown in the screenshot below.
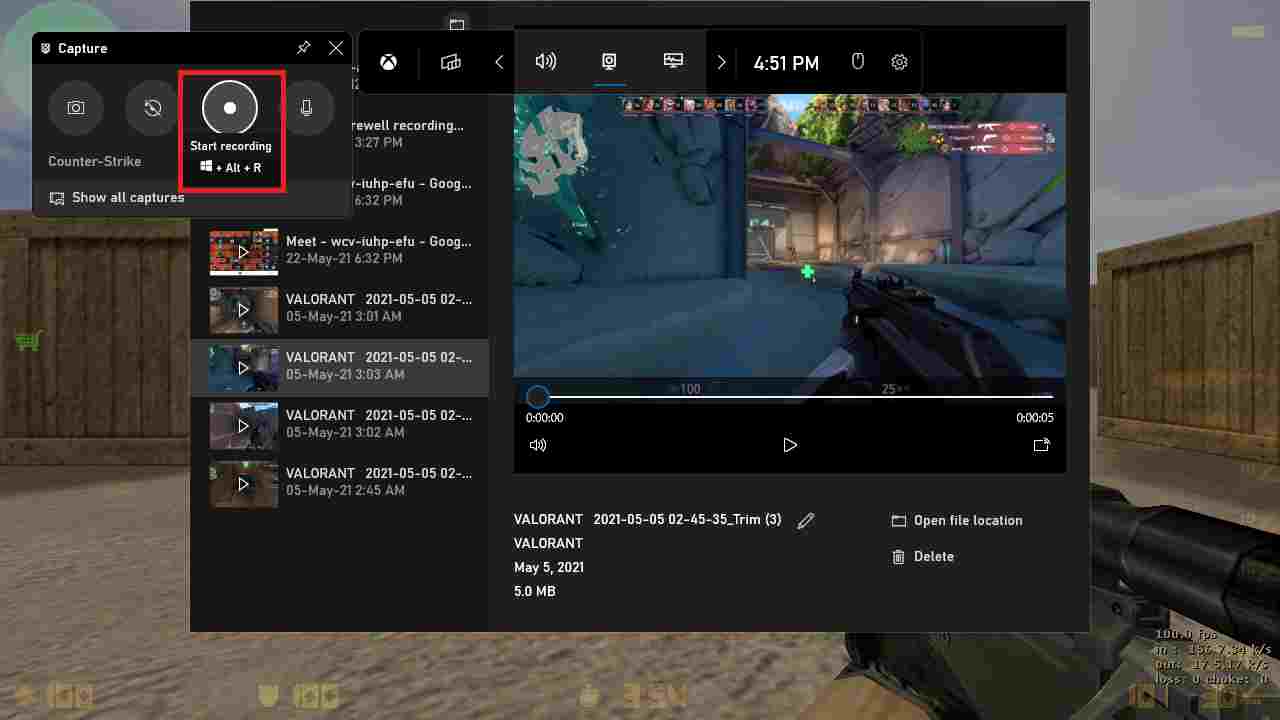
- You can stop the recording anytime by clicking on the Stop button.
Accessing these recordings is really easy. You just need to navigate to This PC > Videos > Captures folder. Here, you can view, edit and delete any of your screen recordings via Xbox Game Bar in Windows 11.
Using Microsoft PowerPoint
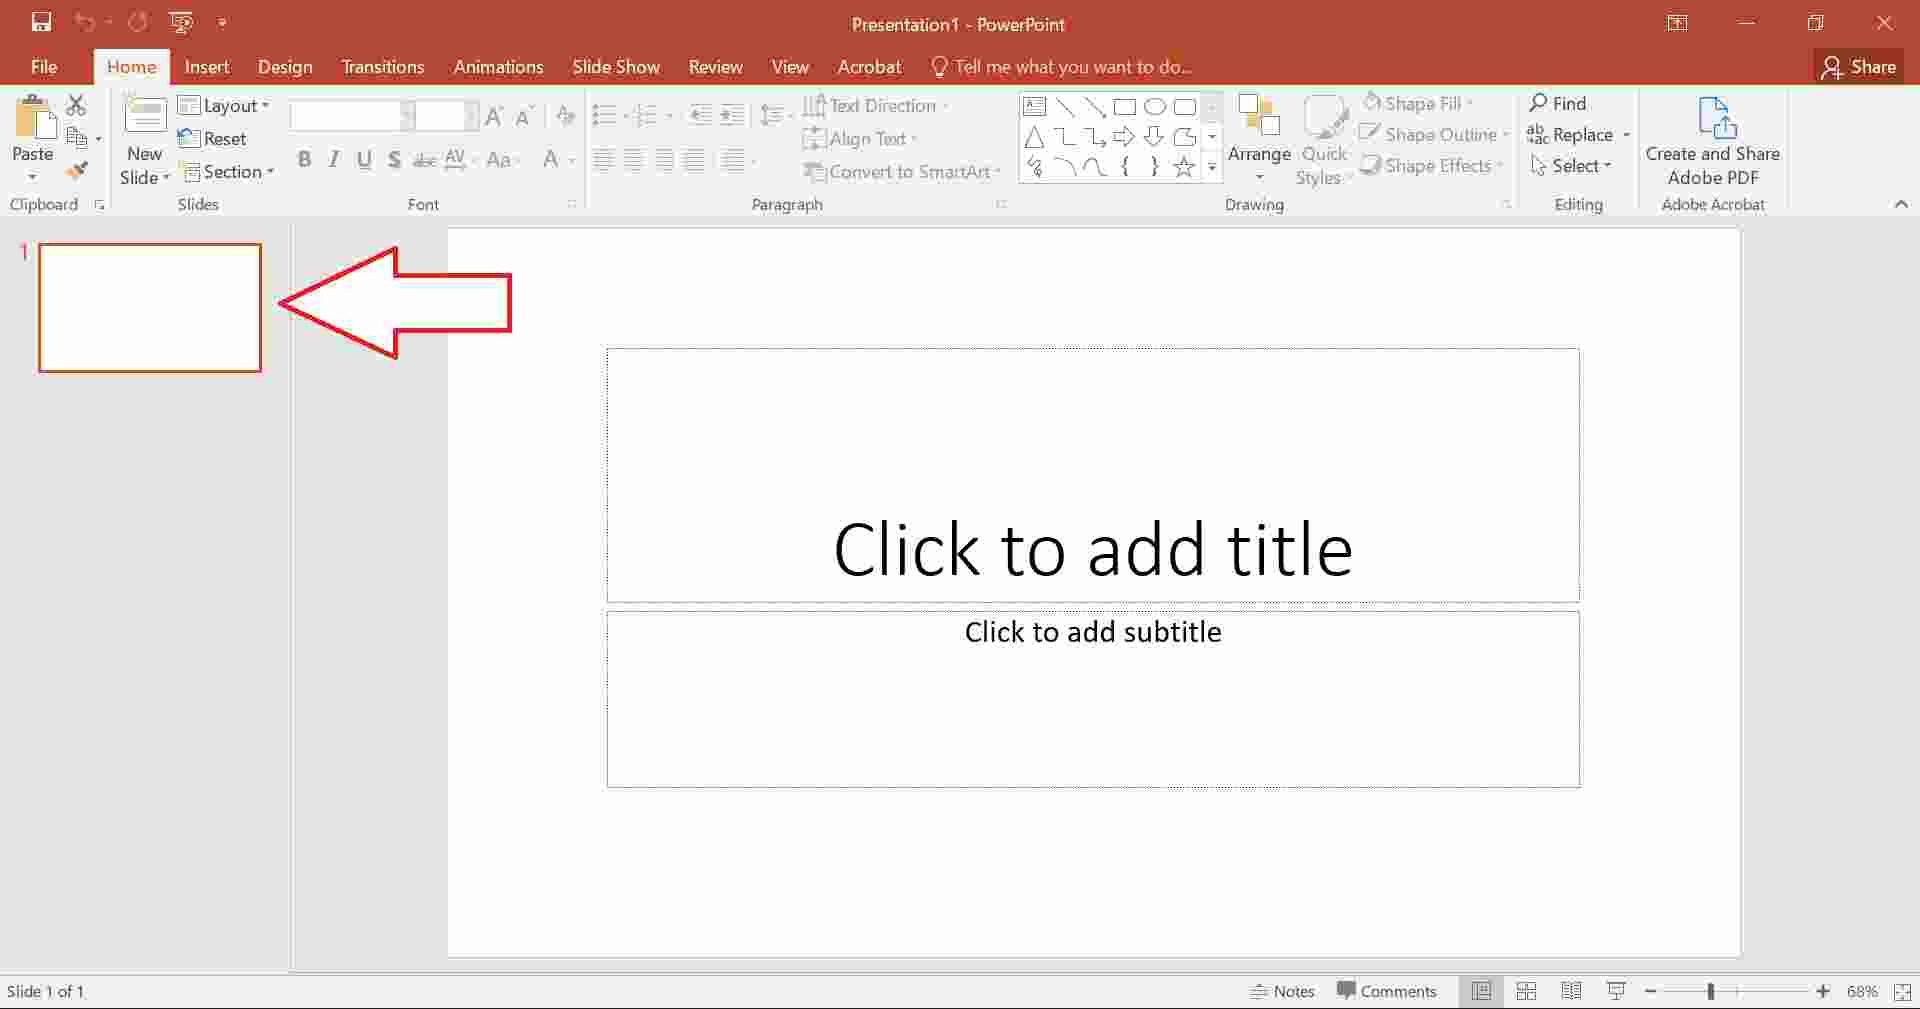
- Launch the Microsoft PowerPoint application and create a blank presentation.
- Select any slide from the left pane.
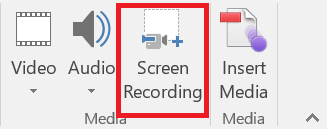
- Switch to the Insert Tab under which you’ll find the option of Screen Recording in the Media section.
- Now, a screen recording pane will appear. You can select the area you want to record by clicking on the Select Area button.
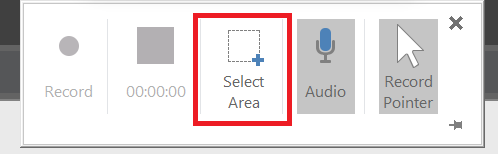
- You’re all set now. All that’s left to do is click on the Record button.
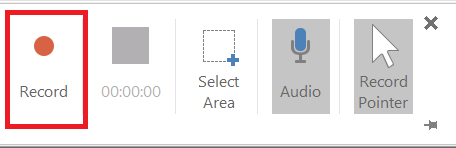
- You can stop the screen recording anytime by clicking on the Stop button.
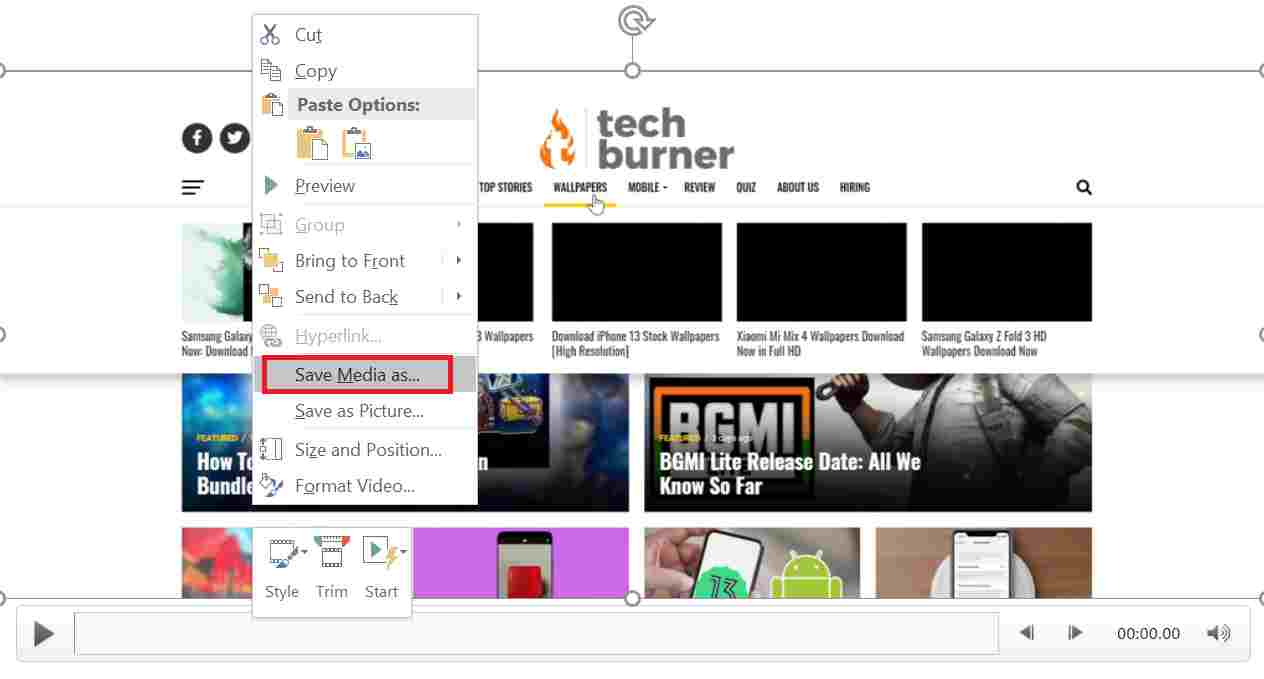
- The screen recording will appear on the next new slide you create. You can save it on your local computer by right-clicking on the video and selecting the Save Media As option.
So, these were the two native methods of how to record your screen on Windows 11 without using any third-party software. For more such useful tech tips and tricks, stay tuned to TechBurner!