ADB (Android Debug Bridge), is technically meant for developers. Yet, there are many scenarios where the ADB tool can be useful and a handy feature to have. It is not an easy task to flash, wipe, root your android device. This is where ADB comes into play and helps us to perform tasks whatever we want to perform on the smartphone. However, earlier, there was a drawback that it required the user to have a PC as the commands couldn’t be sent within the smartphone. Well, with the recent updates, Android has introduced Wireless Debugging, which allows connecting the phone wirelessly. In this article, we will discuss a way to run ADB commands on Android without PC. We will discuss everything you should know about the ADB commands on an Android smartphone. We will try to explain everything briefly and precisely to help you better understand ADB. So, without any further ado, let’s head into the article.

What is ADB?
ADB stands for Android Debug Bridge. This tool is meant for developers and can be defined as the versatile command-line tool that can be used to perform various actions on your smartphones by sending commands to it. ADB can be used for performing various actions on your smartphones such as installing, debugging, flashing, etc. Moreover, it is a client-server-based program that includes: a client, a daemon, and a server.
Advantages of ADB
Talking about the advantages, it has many. But they key advantages are:
- Apps can be installed by commands on PC.
- Bloatware (Pre-installed apps) can be uninstalled successfully.
- Custom ROMs and recoveries can be installed.
- Some root-specific tasks can be performed without rooting.
Must Read | How To Use Google Find My Device: Step By Step Guide
How to run ADB Commands on Android without PC?
Before proceeding further, make sure that you are on running your smartphone on Android 11 or a later version. We will mention the download links at the end of the article so make sure to check them out. Follow the steps below carefully to make sure that nothing goes wrong from your side.
Step 1: Download and install the LADB app from the play store. It is paid app, but actually worth it.
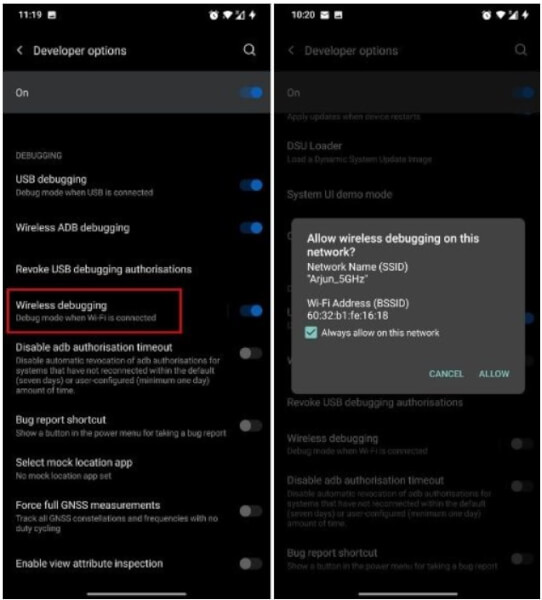
Step 2: In your smartphone, head to the developer options and enable wireless debugging. If you cannot find developer options, you need to enable it first by seeking to build a number and tapping it rapidly about 7-8 times.
Step 3: Also enable Wireless ADB Debugging if you find an option or leave it if your device doesn’t have it.
Step 4: Make sure to check the dialog box saying “Always allow on this network” if appears.

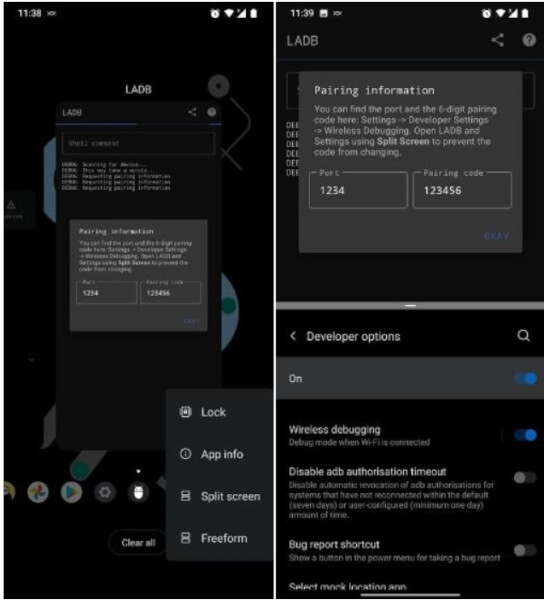
Step 5: Now open the LADB app in split-screen mode.
Step 6: Tap on the wireless debugging option(not toggle) and select “Pair device with pairing code” and note down the code and port number mentioned next to the IP address.

Step 7: Now enter the noted code and port number in the LADB app and then tap “OKAY”. Make sure to be in the split-screen mode so the pairing info does not change.
Step 8: Now wait for few moments and let the LADB app create and establish a local ADB connection.

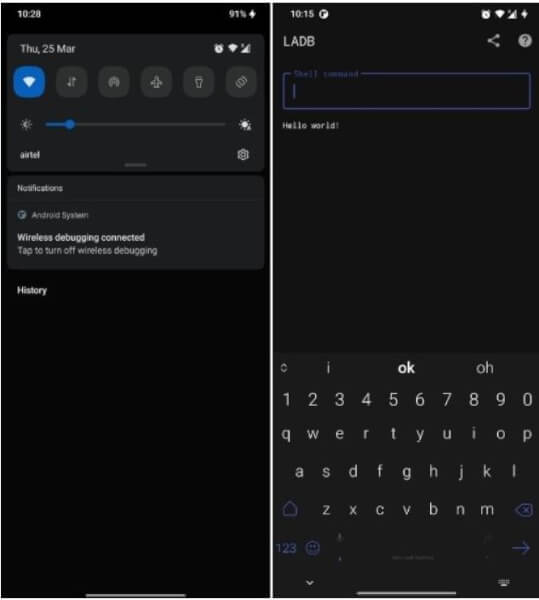
Step 9: Once the connection is successfully established, then you will receive a notification saying connection established and you will see a Hello World message on your screen.
Stepp 10: Voila!! you are now done. You can now use the LADB app to run ADB commands on your android without a PC.
LADB Local ADB Shell—Google PlayStore
That’s it guys for this post, keep an eye out on TechBurner for the latest tech updates!!