Tech Tips
How To Root Asus 6Z? Install TWRP Recovery On Asus 6Z
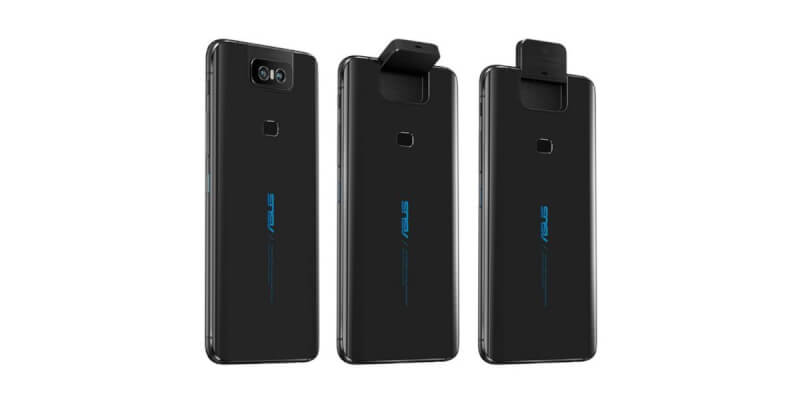
Asus has finally launched its new flagship smartphone with that amazing Flip camera in India at the starting price of just 31,999 INR. It is powered by the latest Snapdragon 855 SoC and on the camera side, it has a 48MP Sony IMX586 sensor with a wide angle lens which also flips up 180 degrees and also works as a selfie camera. The Camera2API is pre-enabled but still, you want to root Asus 6Z then here is a complete guideline on how to root Asus 6Z. Follow all the steps carefully to install TWRP Recovery on Asus 6Z and to install Magisk on Asus 6Z to root it.
Warning
The root will void the warranty of the Asus 6Z. Also, follow the also steps given below very carefully. If you will not follow all the steps properly or if there is some problem occur while rooting the Asus 6Z then you will end up bricking your device. So, root Asus 6Z at your own risk and only if you are pro at rooting.
Pre-Requirements
- First of all, Unlock the Bootloader of Asus 6Z. Download Official Unlock Tool to unlock the bootloader. Click here to download the Unlock Tool. (Select Android OS) Unlocking the bootloader will erase everything from your phone.
- Enable USB Debugging and OEM unlocking on the Asus 6Z from Developer Options.
- Make sure your phone is charged at least 50% to avoid any unexpected shutdown.
- Don’t’ forget to backup all your personal data such as Contacts, App data, Internal storage, and everything. It is always good to backup data while rooting the phone.
- Download all necessary files from the given links and follow the guideline.
Downloads
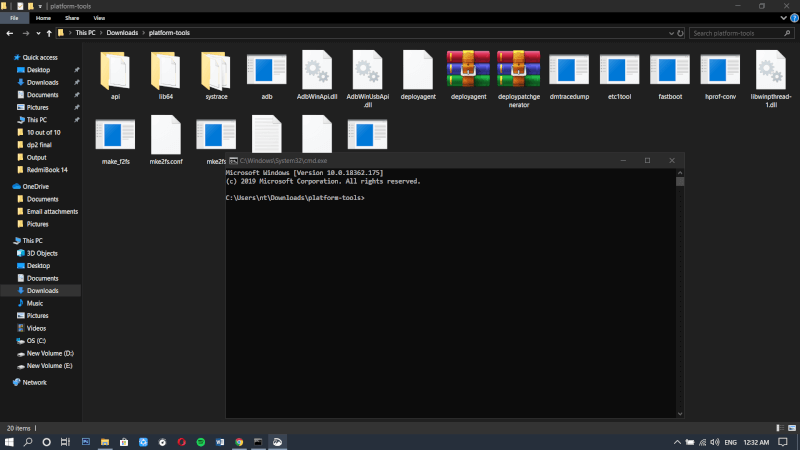
- SDK Platform Tools Download
Download and extract the folder. Now download the TWRP Recovery and copy it to the platform-tools folder.
2. TWRP Recovery for Asus 6Z Download
3. Magisk v19.3 Download
Install TWRP Recovery on Asus 6Z
Follow the below steps to install TWRP Recovery on Asus 6Z.
- Connect Asus 6Z to your PC via USB Cable.
- Open the platform-tools folder. (Copy TWRP file to this folder)
- Type cmd in the address bar and press enter.
4. Now type the following command to check if your device is properly connected to your PC.
“fastboot devices”
5. Type the following command to boot with TWRP Recovery.
“fastboot boot test-twrp-3.3.1-1-I01WD-zenfonde6.img”
6. Your device will boot into TWRP. Now go to Advance > ADB Sideload and swipe.
7. Now use the following command on the PC to flash the TWRP zip file.
“adb sideload test-twrp-3.3.1-1-I01WD-zenfonde6.img”
8. After the TWRP is flashed, go to the main menu of TWRP and Reboot in Recovery Mode. Reboot>Recovery.
Root Asus 6Z / Install Magisk on Asus 6Z
After installing TWRP Recovery let’s now talk about how to install Magisk on Asus 6Z to root it.
- Open the ADB Sideload again in TWRP.
- Now enter the following command to flash the Magisk Zip File.
“adb sideload /path/to/magisk.zip”
(Make sure you use the proper name of the file instead of magisk.zip & replace /path/to/ with the original file destination.)
3. Once Magisk is flashed now reboot Asus 6Z and most probably your phone is rooted now. Magisk manager will be present in your app drawer.
That’s it in this guideline on how to install TWRP Recovery on Asus 6Z and How to root Asus 6Z. Stay tuned with us for much more awesome content.
[Source]